(2014), including the Bank Heist DLC. There are a total of 32 side missions in the game. I recommend going through them after the completion of the main story campaign, as access will be open not only to all tasks, but also to the necessary tools. Items that are especially needed for completing missions or tests, I will mark in a separate column “Equipment Required”.
Side mission availability order:
After the first chapter:
Bank Robbery, Sick Willie, Beauty Inside, Medical Issues, Pulp Fiction, Shenanigans (Hector Missions)
After the second chapter:
Outburst of Madness, Lost Poet, Plunder, Lady's Testament, Watch Your Steps!, Save Face, Balagan (Vittori Missions)
After the fourth chapter:
Cover the Cargo, Poor Defense, Shark Bait, Royal Luxury
After the fifth chapter:
Hangman's pen, Path to riches, Keep your eyes open, Board move, Matter of life and death
After the sixth chapter:
Rule of Thumb, Stonemarket Witch, Point of No Return, General's Bling.
The missions will be considered in that order. The Hector and Vittori missions, as well as the “Bank Robbery” will be a separate column. Begin.
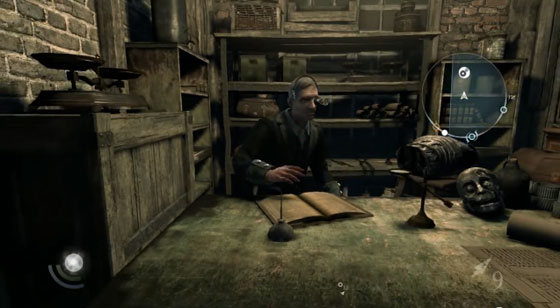
Sick Willy
Willy is very ill, he doesn't have long to live. Basso wants to get it gold watch. Willy's house is located in one of the lanes, you can get inside through the window. Looking around, pay attention to the picture on one of the walls, there are switches on it.
Walkthrough of Thief side missions (2014)
 Walkthrough of Thief side missions (2014)
As soon as you activate the switches, a secret door to the attic will open, and the lifeless poor Willy will fall down from above. Climb up the stairs, open the chest, the clock is in it.
beauty inside
Required equipment: Rope boom
One of the admirers gave the local coquette Miss Scarlett golden mirror. Let's borrow it soon. You can get into the lady's house through the window, but this will require a rope. Shoot the rope arrow at the beam.
Walkthrough of Thief side missions (2014)
 Walkthrough of Thief side missions (2014)
Once inside, be careful. Although the girl is sleeping soundly, besides her, there is another person in the house. The thing we need is in the safe, and the safe is behind the picture.
Walkthrough of Thief side missions (2014)
 Walkthrough of Thief side missions (2014)
As we learn from the note in the house, the code for the safe is carved into the wood inside the closet (824). We pick up the mirror, while paying attention to another locker nearby, there is valuable trophy.
medical problems
Medicine from Darkness found! So says Dr. Troy. But he is in no hurry to share the results, which means that we ourselves will get the fruit of his labors. You can get to his pharmacy through a couple of windows. There is a doctor in one room, two guards in the other.
Walkthrough of Thief side missions (2014)
 Walkthrough of Thief side missions (2014)
When the doctor is distracted, grab the drug sample that is on the table.
Dangerous Fiction
It seems that someone has decided to publish a work containing facts from the life of our friend Basso. Some things are best kept secret. Need to find manuscript. First, it is worth visiting the writer's house, he will not be there, as well as the manuscript. The marker will point to another building, this is the abode of the bookmakers of the Clock Tower. Entrance in one of the lanes.
Walkthrough of Thief side missions (2014)
 Walkthrough of Thief side missions (2014)
While exploring the environment, you will come across a number of books. Among them is a switch.
Walkthrough of Thief side missions (2014)
 Walkthrough of Thief side missions (2014)
A secret entrance to the basement will open, where the manuscript we need lies.
Attack of insanity
Required equipment: Razor, Rope boom
The paintings of one crazy artist are selling like pies. Basso knows where one such pie is. We'll get this one for him. picture. Everything will be ridiculously simple.
Walkthrough of Thief side missions (2014)
 Walkthrough of Thief side missions (2014)
Use the rope arrow to get closer to the window of the painting room. Then we take a picture.
The Lost Poet
Required equipment: Razor, Wrench
The fashionable poet was mowed down by darkness. It is said that before he disappeared, he was working on his latest masterpiece. Let's get verse for Basso. Collect the work of the poet will have to piece by piece. Only 5 parts. The first one is on the cabinet right at the entrance.
Walkthrough of Thief side missions (2014)
 Walkthrough of Thief side missions (2014)
The second one is in the box next to it.
Walkthrough of Thief side missions (2014)
 Walkthrough of Thief side missions (2014)
The third is under the food bag by the bed.
Walkthrough of Thief side missions (2014)
 Walkthrough of Thief side missions (2014)
To take the fourth passage of the verse, you need to get into another room through the pipe.
Walkthrough of Thief side missions (2014)
 Walkthrough of Thief side missions (2014)
Excerpt behind the chest.
Walkthrough of Thief side missions (2014)
 Walkthrough of Thief side missions (2014)
Fifth passage in a drawer.
Walkthrough of Thief side missions (2014)
 Walkthrough of Thief side missions (2014)
Do not leave immediately, look into the bathroom, there will be valuable trophy in the form of a picture.
Steal the loot
Required equipment: 2 rope arrows, 2 blunt arrows
It is necessary to teach a lesson to one dealer John Tallow, who trades in the territory of Basso. The problem is, Tallow did a pretty good job of hiding. To get to his house, you need to find a beam on Baron Avenue not far from the marker and shoot a rope arrow at it.
Walkthrough of Thief side missions (2014)
 Walkthrough of Thief side missions (2014)
Having climbed the rope, we move further along the ledges, and we find another beam, repeat the action.
Walkthrough of Thief side missions (2014)
 Walkthrough of Thief side missions (2014)
Now we need to lower the wooden bridge above us. We shoot at the highlighted area with a blunt arrow.
Walkthrough of Thief side missions (2014)
 Walkthrough of Thief side missions (2014)
We climb the rope, go down to the bridge and approach the window with bars. To lower the grate, shoot at the switch in the house.
Walkthrough of Thief side missions (2014)
 Walkthrough of Thief side missions (2014)
Inside we find a shelf with books, activate the hidden switch. Voila. Here is the acquired Tallow.
Lady's testament
Required equipment: Razor
Lady Christina went a little crazy and then died of the Gloom. Being out of her mind, she hid her will now her children are in danger of being impoverished. We need to find a will to save her family. Having penetrated into the house with the belongings of Lady Christina, pay attention to two cabinets placed close to each other. Climb on them, you will see a chest of drawers, where the will lies in the box.
Walkthrough of Thief side missions (2014)
 Walkthrough of Thief side missions (2014)
But that's not all. A small passage is hidden behind other rubbish.
Walkthrough of Thief side missions (2014)
 Walkthrough of Thief side missions (2014)
There is a button on one of the barrels, by clicking on which you will open a secret room with painting an artist already known to us.
Look under your feet!
Required equipment: wire cutters
We have a non-trivial task. You don't need to steal anything, you just need defuse the traps, which one very disrespectful gentleman put at the transshipment point of Basso thieves.
Walkthrough of Thief side missions (2014)
 Walkthrough of Thief side missions (2014)
You can enter from the side of Stonemarket or Baron Avenue, you choose.
save face
Required equipment: Wrench
Lord Alderley is dissatisfied with the result of the work of the best sculptors of the Crowley and Sons stone market. His appearance on one of the creations was conveyed, as they say, without embellishment, so it would be better for us to make sure that no one sees this misunderstanding. In the office sculpture located in the basement, but do not rush.
Walkthrough of Thief side missions (2014)
 Walkthrough of Thief side missions (2014)
There is another trap on the floor. twist memorial plaque nearby, behind it there will be a button that will turn off the trap. After that, you can safely take the sculpture.
cover the load
Required equipment: wire cutters, Rope boom
The guards are doing some dark things in the port, you can make good money if you steal an account registry and then blackmail the administrator. There are bars on the windows of the office, we turn them off, disabling the nearby mechanism on the street.
Walkthrough of Thief side missions (2014)
 Walkthrough of Thief side missions (2014)
Then we find a beam with which we will rise to the office.
Walkthrough of Thief side missions (2014)
 Walkthrough of Thief side missions (2014)
In the office, we are looking for a switch in the picture, by activating it, we will open a secret cache where the registry is hidden.
Bad defense
Required equipment: wire cutters
The Ugreeds are not fulfilling their duty of protecting the Carders' Ditch, although money they received. No protection, no money. We'll take the entire payment. Valuables are in the closet.
Walkthrough of Thief side missions (2014)
 Walkthrough of Thief side missions (2014)
But the path is blocked by a floor trap. The control mechanism is right outside the window.
Walkthrough of Thief side missions (2014)
 Walkthrough of Thief side missions (2014)
After deactivating the trap, we take away everything that lies in the closet.
shark bait
Required equipment: wire cutters
Eddie Levac lends money to the poor and then severely punishes them if they can't repay, while he himself owes money to the poor. We need to mess up Eddie's business and completely rob his shop. There is a floor trap at the entrance.
Walkthrough of Thief side missions (2014)
 Walkthrough of Thief side missions (2014)
Crouching, pass by her. Collect the available valuables, then open the closet. There will be a vase, break it, you will see a button. She opens a secret door to the office, where there are more jewels, as well as a trap control mechanism.
Walkthrough of Thief side missions (2014)
 Walkthrough of Thief side missions (2014)
Walkthrough of Thief side missions (2014)
 Walkthrough of Thief side missions (2014)
After deactivating the traps, break open the safe and collect the remaining loot.
Royal luxury
Required equipment: Rope boom
Basso's sweetheart, Comfort, lent her protégé necklace. But, apparently, Comfort does not observe her jewel as often as she would like. We need to invite Little Lucy to dinner, where she will be explained the rules for handling other people's property. To get into her house, we need a rope.
Walkthrough of Thief side missions (2014)
 Walkthrough of Thief side missions (2014)
On it we will go down to the floor below. But once inside, we will find the lifeless body of Lucy without a necklace. From the note we learn that the necklace is from another lady in a house nearby. When we get there, we will see another unpleasant scene. But our business is simple, we take the necklace from the table and leave the house.
hangman's pen
Required equipment: wire cutters, Rope boom
Little Davey was hanged, it so happened that he had his beloved with him basso pen. We need to get into the executioner's house and bring her back. First you need to lower the bridge opposite the window where the executioner lives. This can be done using the mechanism around the corner.
Walkthrough of Thief side missions (2014)
 Walkthrough of Thief side missions (2014)
We pass along the bridge, we see the beam. Use the rope arrow and jump to the window. Being inside we approach the bookshelf. There's a switch here, turn it on. We find a secret room. After reading the notes of the executioner, we learn terrible things. We pick up the pen near the diary.
Way to Wealth
Required equipment: Rope boom
The client wants to get the documents trading house "White sail". Having made our way into their building, we pay attention to the beam at the pipe.
Walkthrough of Thief side missions (2014)
 Walkthrough of Thief side missions (2014)
Use the rope arrow to climb up. The required documents are there.
look both ways
Required equipment: wire cutters
"Illyrian Import" has at its disposal a miracle telescope. Basso's smugglers need him. We'll steal this thing for him. Once inside the office, we see some dead poor fellow. You don't have to avoid the protruding floor slab, on the contrary, you need to place a weight on it to open the hidden door.
Walkthrough of Thief side missions (2014)
 Walkthrough of Thief side missions (2014)
Use the body of the deceased as a load, in the opened room there is a mechanism, the deactivation of which will allow you to break open the previously inaccessible door. Then everything is elementary: we go down the rope and take the telescope from the box.
board move
Required equipment: wire cutters
Archie Maxwell stole from Basso chess horse. We will return not only the horse, but also take the stash. The owner is in the house, he hid the horse in a safe in the basement. We look at the floor - a trap.
Walkthrough of Thief side missions (2014)
 Walkthrough of Thief side missions (2014)
Nearby is a mechanism that allows it to be deactivated.
Walkthrough of Thief side missions (2014)
 Walkthrough of Thief side missions (2014)
The code for the safe was helpfully written in one of the documents in the house - 776.
A matter of life and death
Required equipment: Rope boom
The task is to get grandfather's ashes clients. It is a pity that the goal is not as noble as it might seem at first glance. After all, in the urn, in addition to grandfather, a portion of opium. There are two ways to get to the warehouse. The fastest one is to climb up to the warehouse office with the rope arrow.
Walkthrough of Thief side missions (2014)
 Walkthrough of Thief side missions (2014)
Once you're at the top, look around. Traps are set here, you can neutralize or bypass. We break down the door. In the left cabinet we find an urn with ashes.
Rule of thumb
Required equipment: Rope boom
It is necessary to steal silver scissors from the cruel leader of the Ugreeds, with which he cuts off the fingers of his subordinates. You can get into his house by climbing a rope to the second floor right next to the building with a marker.
Walkthrough of Thief side missions (2014)
 Walkthrough of Thief side missions (2014)
We stun / kill or quietly steal his precious scissors. I propose the first option, because there is another valuable reward in the house.
Walkthrough of Thief side missions (2014)
 Walkthrough of Thief side missions (2014)
After breaking the vase in the closet, you will see a button that will open the cache with trophy.
stonemarket witch
Required equipment: Wrench
Basso coveted dagger apothecaries. Rumor has it that she is a witch. But work is work, let's get the dagger. It is located under the pharmacy, the entrance to the basement is through a pipe in one of the nooks and crannies.
Walkthrough of Thief side missions (2014)
 Walkthrough of Thief side missions (2014)
I came, I saw, I took.
point of no return
Required equipment: wire cutters
The store at Lame Gate is a tough nut to crack for thieves. Therefore, Basso sent the best, that is, us. An inconspicuous entrance to the territory is located in one of the lower alleys.
Walkthrough of Thief side missions (2014)
 Walkthrough of Thief side missions (2014)
To open the door, you need to deactivate the mechanism, it is very close.
Walkthrough of Thief side missions (2014)
 Walkthrough of Thief side missions (2014)
Inside we will see a picture and the corpse of a colleague. We do not touch the picture yet. Trap. The mechanism is right in front of the picture. As soon as you disarm the trap, you will find a switch behind the picture. He opens the cache to the desired prey.
General's trinket
A very simple mission. The only difficulty here is the two guards at the target. You can neutralize them or distract them, the main thing is to take the name Order of the General.
Ector missions
"Machinations". After you find Ector's shop and talk to him, the "Machination" mission will be considered completed, while Ector will begin to offer you new tasks himself. In total, Ector will have three missions available, one after the other. The goal of the tasks is to collect parts of the mechanical man that Hector wants to complete.
Walkthrough of Thief side missions (2014)
 Walkthrough of Thief side missions (2014)
Hector's First Mission: Handmade
Required equipment: Razor
Challenges: Be invisible, 5 pickpockets, Kill/stun one person, Steal everything
The player must infiltrate Alfonso's studio and steal mechanical hand. Possible entry routes include the main entrance, the back door behind the studio, and the second floor window.
Map “First floor of the studio”
Walkthrough of Thief side missions (2014)
 Walkthrough of Thief side missions (2014)
The safest way to enter is the third way - through the window.
Walkthrough of Thief side missions (2014)
 Walkthrough of Thief side missions (2014)
The second floor is patrolled by only one guard. If you are aiming to steal all the valuables in the house, then you should definitely have a razor with you to cut out a trophy picture.
Map “Second floor of the studio”
Walkthrough of Thief side missions (2014)
 Walkthrough of Thief side missions (2014)
After cleaning, you can immediately go down to the basement. Where, in fact, is the mechanical arm. There is one guard in the basement, but if you manage to crack the safe with the main trophy without attracting his attention, he will leave the premises, going outside.
Atelier Basement Map
Walkthrough of Thief side missions (2014)
 Walkthrough of Thief side missions (2014)
After that, you can go up to the first floor, where you will see the scene of beating the owner of the atelier. It's good for us, no need to stun the civilian. It remains for you to collect the remaining loot, if you wish, and then leave the territory of the studio and bring a hand to Ector.
Other Tips:
There are only 4 guards with 5 wallets in the mission, in order to complete one of the challenges, you must first rob the guard, and only then stun him if necessary, otherwise the challenge will fail.
Hector's Second Mission: Silence is Golden
Required equipment: 2 any arrows, 3 hunting or serrated arrows, rope boom, choke arrow, wire cutters, Razor
Challenges: Be invisible, Use environment 1 time, Get 3 headshots, Steal everything
Hector needs voice box, who had already been kidnapped by one of the thieves hired by him, but the thief was seized and hanged. We need to find the hanged man and pick up the device. When you get to the place, you will see a hanged thief, to lower him you need to shoot at the loop.
Walkthrough of Thief side missions (2014)
 Walkthrough of Thief side missions (2014)
The hanged man will have a note from which we learn that the apparatus is in Oxhart Perry. Our path lies in his shop. However, not everything is so simple, in order to get into the shop you need to climb onto the ledge. Here we will be helped by a rope arrow, which needs to be shot at a beam near the destination.
Walkthrough of Thief side missions (2014)
 Walkthrough of Thief side missions (2014)
We climb the rope, climb into the window. We get into the room, look for another window, through it we go out to the ledges we need. From there, close to the entrance to the shop.
Finally, we are on the territory of the store, starting in an abandoned house.
Abandoned House Map
Walkthrough of Thief side missions (2014)
 Walkthrough of Thief side missions (2014)
From here we should go to the courtyard, where the guard and the dog are. For collectors - the security guard has a document.
Walkthrough of Thief side missions (2014)
 Walkthrough of Thief side missions (2014)
There are two ways to get into the building - through the main passage or jump into the basement. The first option will be safer.
Map “Oxheart Perry's Store (1st floor)”
Walkthrough of Thief side missions (2014)
 Walkthrough of Thief side missions (2014)
If you chose the second path, then do not rush to immediately clear the territory. There is a trap on one of the chests.
Walkthrough of Thief side missions (2014)
 Walkthrough of Thief side missions (2014)
For the same reason, you should not immediately climb into the vault with the safe where the device is located. First you need to go up to the second floor, where in Oxhart's room you can turn off the trap mechanism in the house. After that, you can safely put everything you see in your pocket, including the voice box for a mechanical person.
Map “Oxheart Perry's Store (2nd floor)”
Walkthrough of Thief side missions (2014)
 Walkthrough of Thief side missions (2014)
Map “Oxheart Perry's Store (basement)”
Walkthrough of Thief side missions (2014)
 Walkthrough of Thief side missions (2014)
After clearing, you can leave the mission and take the main trophy to Ector.
Other Tips:
The razor is needed for one painting in the house.
To complete one of the tests, you need to break the holder with an arrow, but if you do this without stunning the guard, then raise the alarm by failing another test - be invisible. To successfully complete the tests, you need to quietly stun (kill) all the characters and put the dog to sleep with a strangling arrow.
There are three guards and Oxheart on the map. Keep this in mind when doing one of the three headshot challenges, and don't get carried away with melee neutralizations.
Ector's third mission: Heartbreak
Trials: Steal everything
Ector's last task. We need to get heart for a mechanical man, which is located at a certain Watchmaker. When we get to his house, we find no one. I recommend that you immediately start from the second floor and collect all the loot there.
Map “Watchmaker's House (2nd floor)”
Walkthrough of Thief side missions (2014)
 Walkthrough of Thief side missions (2014)
Returning to the first floor, we collect valuables / documents, pay attention to the switch on the pedestal in one of the rooms. By activating it, you will open access to another room, where there is another switch.
Walkthrough of Thief side missions (2014)
 Walkthrough of Thief side missions (2014)
Map “Watchmaker's House (1st floor)”
Walkthrough of Thief side missions (2014)
 Walkthrough of Thief side missions (2014)
By clicking on the switches, you can get into a few more rooms. The last one is behind the bookshelf. An elevator will become available, which takes us to the workshop.
Map “Workshop”
Walkthrough of Thief side missions (2014)
 Walkthrough of Thief side missions (2014)
In one of the walls you can see a switch, after activation of which a puzzle appears. Click on the blocks in the given order to solve the puzzle:
Walkthrough of Thief side missions (2014)
 Walkthrough of Thief side missions (2014)
Our final stop is the Pendulum Project. The heart is within easy reach, but the last obstacle ahead is the floor slabs. If you go through them in the wrong order, then the path to the heart will be closed. In the notes scattered around the house, there are clues to solve this riddle. If you don't want to bother, here's the right route:
Walkthrough of Thief side missions (2014)
 Walkthrough of Thief side missions (2014)
We take the loot and get out of here.
Map “Project “Pendulum” ”
Walkthrough of Thief side missions (2014)
 Walkthrough of Thief side missions (2014)
We take the heart to Ector and the mechanical man is complete!
Vittori missions
Are a continuation of Basso's mission "Balagan". After you talk to Vittori in the Siren's Rest tavern, the mission "Balagan" will be considered completed, while Vittori will begin to offer you new tasks himself. In total, Vittori, like Ector, will have three missions available, one after the other. Vittori is greedy for exotic things, so he will be interested in obtaining them.
Walkthrough of Thief side missions (2014)
Walkthrough of Thief side missions (2014)
Vittori's first mission: The Golden Mean
Required equipment: Wrench
Challenges: Be invisible, No damage, Stun 2 in combat, Steal everything
Vittori wants to get talking skull, while he does not know exactly where this curiosity is located. The location of the value is known to Drunk Lenny, so our task is to follow the drunkard, along the way helping him get to his final destination.
Smelly Alley Map
Walkthrough of Thief side missions (2014)
 Walkthrough of Thief side missions (2014)
First, open the gate.
Walkthrough of Thief side missions (2014)
 Walkthrough of Thief side missions (2014)
Then we turn the valve to cut off Lenny from the guards.
Walkthrough of Thief side missions (2014)
 Walkthrough of Thief side missions (2014)
Then we need to get rid of the lady on the bridge. Don't get distracted, Lenny.
Walkthrough of Thief side missions (2014)
 Walkthrough of Thief side missions (2014)
The final part is the opening of another gate, here is the skull.
Walkthrough of Thief side missions (2014)
 Walkthrough of Thief side missions (2014)
We ended up in a warehouse of ugrates. The warehouse is divided into three levels: basement, first floor and second floor. The skull is in one of the chests on the second floor. You can slip onto the stairs behind Lenny and one of the guards on the first floor, or go through the basement - a little safer, but you need a rope arrow to get to another floor.
Map “Warehouse of Ugreeds (basement)”
Walkthrough of Thief side missions (2014)
 Walkthrough of Thief side missions (2014)
Map “Warehouse of Ugreeds (1st floor)”
Walkthrough of Thief side missions (2014)
 Walkthrough of Thief side missions (2014)
Map “Warehouse of Ugreeds (2nd floor)”
Walkthrough of Thief side missions (2014)
 Walkthrough of Thief side missions (2014)
It remains to take the skull and take it to Vittori.
Other Tips:
Completing a challenge that requires a stun in combat can cause problems when completing the Be Invisible challenge at the same time, as a silent stun does not count towards a stun in combat. To successfully complete all the tests, it is necessary to shoot the guards in any part of the body, with the exception of the head. Guardians will go into yellow alert level, but there will be no detection, after that you can perform a stun, which will count as "Stun in battle".
Second Vittori Mission: Gourmet
Required equipment: Razor
Challenges: Be invisible, Don't kill/stun, Stun 1 from above, Steal everything
This time Vittori wants us to bring him octocot, a cat with eight legs. It is now in the possession of a collector in Riverside. To get to the place, you need to get into the house opposite the sign in the South Quarter.
Walkthrough of Thief side missions (2014)
 Walkthrough of Thief side missions (2014)
Then climb out through the window directly onto the ledges, cross them across the street. Next will be a window through which we will get to the task. We will find ourselves in a building opposite the collector's house. There are three ways to enter the house. The safest among them is through the second floor window using a rope arrow.
Map “Collector's House (1st floor)”
Walkthrough of Thief side missions (2014)
 Walkthrough of Thief side missions (2014)
Map “Collector's House (2nd floor)”
Walkthrough of Thief side missions (2014)
 Walkthrough of Thief side missions (2014)
Map “Alley near the collector’s house”
Walkthrough of Thief side missions (2014)
 Walkthrough of Thief side missions (2014)
Having found a note in one of the rooms, we learn that the owner keeps the most valuable things in a separate room, the entrance to which is guarded by a safe. It is in the wine cellar. After going down there, find the picture, a safe is hidden behind it.
Walkthrough of Thief side missions (2014)
 Walkthrough of Thief side missions (2014)
The code for the safe, as is clear from the note, is the owner's birthday. After reading the will, with the simplest calculation we determine the code - 812. We find ourselves in another section of the wine cellar, where in one of the cabinets we find a jar of oktokot.
Third Vittori Mission: Extra Attraction
Required equipment: Wrench, 4 any arrows
Challenges: Be invisible, Perform 4 diversions, Stun 4 in combat, Steal everything
Beloved Vittori - Isabella arrested for strange behavior. She languishes in the Watch section. Our job is to get her out of there. Once inside, we will face an impressive number of guards. With a fight or silently, we need to get into a locked office on the top floor, where the key to the doors in the dungeon lies.
Walkthrough of Thief side missions (2014)
 Walkthrough of Thief side missions (2014)
After that, you can go straight to the cameras.
Map “Guard Station (upper floor)”
When you open Isabella's cell, you will be a little embarrassed. But there's nothing to be done, it is necessary to pull out the princess. Be careful, after the release, two new guards will appear at the entrance to the cells. After passing them, take Isabella to the exit, then return to Vittori. The attraction is over.
Other Tips:
To complete the challenge with diversions, simply shoot an arrow next to one of the guards. He will be alarmed, wait a bit, one diversion will be counted. Repeat this three more times.
Similar to the Golden Mean quest, silent stuns do not count towards stuns during combat. Therefore, in order to complete these two tests at the same time, follow the same algorithm of action described in the “Golden Mean” task.
Bank robbery
Required equipment: Wrench, wire cutters
Walkthrough of Thief side missions (2014)
Walkthrough of Thief side missions (2014)
The mission is unique primarily because it contains mechanical security cameras, which are not found anywhere else in the game. The initial goal is not set immediately, the player is required to infiltrate the bank in order to receive further orders. He can do this using three ways: through the main entrance (1), through the window on the first floor (2) or through the window on the second floor (requires a rope arrow) (3).
Walkthrough of Thief side missions (2014)
 Walkthrough of Thief side missions (2014)
Walkthrough of Thief side missions (2014)
 Thief side mission walkthrough (2014) Thief side mission walkthrough (2014)
Also, when reading the notes, you will become aware of the value hidden in one of the vases, your additional goal is to find and break this vase. Do not rush to beat everything in a row, the vase is in storage, and we will go there.
Once in the room with cells, do not rush to break open the main door to the vault, otherwise you will fall into a trap. To neutralize it, climb onto the racks with cells, turning your back to the entrance to the vault, under the bust you will see a trap mechanism, that's what you need.
Walkthrough of Thief side missions (2014)
 Walkthrough of Thief side missions (2014)
After that, you can start hacking cells with values (07, 09, 11, 21, 23).
Map “First floor of the bank (cells)”
Walkthrough of Thief side missions (2014)
 Walkthrough of Thief side missions (2014)
After collecting the items, we proceed to break open the door leading to the main storage. If you read the notes carefully, then you know that the code for the safe is 682, but if you read even more carefully, then you know that one of the disks is malfunctioning, so this combination will not work. By enumeration we get: 632.
Once inside, we are in no hurry, the room is crammed with traps. To begin with, we turn off the floor trap mechanism, which is located behind the bars directly under the stairs on the first floor.
Walkthrough of Thief side missions (2014)
 Walkthrough of Thief side missions (2014)
It seems that the path to the Star of Aldale is clear. Not really. Another trap awaits us, but it turns off simply. You just need to press the button on the left of the pedestal.
Map “Storage (2nd floor)
Walkthrough of Thief side missions (2014)
 Walkthrough of Thief side missions (2014)
After collecting all the jewels, you can safely leave the mission.
Other Tips:
Cameras are neutralized by water arrows, there are 9 cameras in total on the territory of the bank, keep this in mind when choosing equipment.
One of the mission challenges requires two stuns from above, the easiest way to complete the challenge is to stun from lockers.
Since the Hector, Vittori, and Bank Heist missions can be replayed, I will mark the places on the map where you can start these tasks again. Red - Hector's task, green - Vittori, blue - Bank.
Walkthrough of Thief side missions (2014)
 Walkthrough of Thief side missions (2014)
That's all, I hope my guide will be useful.
Break into the bank
We head to the entrance to the bank. We find ourselves at a small dead end, jump over the grate to the other side on the left, we see the main entrance to the bank, which is guarded. You can sneak through the guards and cells to the main entrance and pick the lock
Or you can go to the left of the bank to a small dead end, if you look up there will be a beam that you can shoot with a rope arrow. We climb the rope to the second floors to the window. We overhear how one of the employees says that he found a piece of paper with numbers, which can be a combination from the safe. He hid the scrap in one of the lockers, and wrote down the number of the locker and it lies in his pocket.
Open the vault. Find a combination
We are waiting for the employees who spoke to disperse. Both of them will stand against the cabinets with their backs to each other, we search their pockets, we get a note with the locker number - cell number 7. We go down to the lobby. We go into the rooms behind the bars - the lower offices, the clerk will walk back and forth there, and a woman walks near the bookshelves, where she walks in the desk drawer you can find the document “Vault Repair Report” from which we learn the second digit of the combination.

Next to the sleeping guard, we open a complex lock to the door, we penetrate into the external storage of the bank. The cameras can be turned off either with water arrows (you need to shoot not at the cameras themselves, but at the light in the mounts), go up to the cells and turn off the traps in the bust with wire cutters. Then we open the cell with one more digit to the code of the safe in the bank.

We look in the notes for the first two codes. Well, after that you can pick up the third digit to the safe in the bank. all in all, code to the safe 6-3-2
Steal the Star of Aldale
If we go upstairs, we go around the traps and make our way through the tables under the cameras, press the levers to open the bars, inside we take more letters and guarantees. We need to go down the stairs. On the sides of the stairs, you can unscrew the grate bolts and climb to the box in which we turn off the traps with the help of wire cutters. We go to the grate in the center, press the levers on both sides. Attention, before taking the star, on the left in the table, press the button to turn off the alarm and not raise the kipish. After that, you can take the "Star of Aldale" from the table. We leave the bank.
Handmade
To get the task "handmade" we go to Ector's store. Hector will complain to us about the fact that a certain Alfonso stole a mechanical hand for scratching his back from him. We need to get into Alfonso's studio and steal this hand from him.
After we accept the task, it will be displayed on the map, we go to the point we need. Arriving at the place around the corner, we observe the scene of how one man pisses off another. Waiting for them to disperse. One of them will sit on a bench and immediately fall asleep, the other will stand on the street.
Steal a mechanical arm

We go around it by standing in the shade and jumping light with a jerk or distract it with a thrown bottle. Behind him is the entrance to the studio, behind which the tailor communicates with someone. we go around from the back entrance, again we see them in the open door, we need to go around them. We rise next to the door to the second floor using the claw
In the room, we unscrew the bolts from the grate, in the wall, crawl into the bathroom, from it we pass into the bedroom. If you open the bedside table next to the bed, we will find a new trophy "Statue Lady" We go down the stairs to the basement, hiding from prying eyes, well, or in the old fashioned way with a fight. We open the iron safe in the wall, take the mechanical hand, leave the place.
steal a painting
razor needed
rope rope

We leave for Montessi's dwelling (located on the clock square). To get inside, we shoot with a rope rope at the beam, but do not climb up into the window of the house. Cut out the picture on the wall. Get the "Danger of Seduction" trophy
Steal sick Willie's wristwatch
Location: Clock Tower Square

Searching the painting
We penetrate from the street through the window into the house of Sick Willy. We search the picture on the wall, a secret room will open, there we will see the dead Willy. We go up the stairs to the attic. The box will contain a clock.
medical problems

Troy is constantly mumbling some bullshit
Tools: wrench
location Clock Tower Square
We penetrate by raising the window to the Pharmacy of Troy. Next in the corridor we unscrew the grate with a wrench, we crawl into Troy's room. Troy's miracle tonic lies on the table, we knock out Troy, or wait for him to turn away and grab his tonic. We leave the same way we came.
beauty inside
Steal a hand mirror

Location Clock Tower Square
Required tools: rope arrow
You can get there if you shoot a rope arrow at a beam on the street. We climb the rope up to the window, raise it and get inside the house of Miss Scarlett.
We open the lock in the bedside table next to the bed and a letter in which the girl writes that she spied on her father from the closet and wrote the cipher on the tree. a girl sleeps in bed, and her father constantly comes into the room. We go down to the first floor. On the ground floor, behind the picture that is near the window, there is a safe. code 8-2-4 in it lies our mirror.
General's trinket
We go into the basement in which there are two guards. You can go down the stairs, you can find the grate, unscrew the bolts and climb behind the guards. We eliminate the guards. We open the next door, in the chest will be this "new medal of the general"
booth
Meet Vittori at Siren's Rest

We leave for the Siren's Rest tavern to meet with Vittori. The guards confiscated his pleasure ship from him, and the thieves stole his valuables. He needs to get it all back. talking skull-seer. We accept this assignment. We get a new task "golden mean", the task of the booth is completed.
Look under your feet
We need to bypass the guards and climb into the room through the open window, with wire cutters we turn off the traps in the room on this task is completed.
Prologue: FallOn the eve of the summer festival, professional thief Garrett receives a tip on a big booty from his informant Basso. The task is complicated by the fact that he does not have to work alone. Garrett, accustomed to act quickly and quietly, will be paired with a daring and uncompromising young girl named Erin. Before the main business, Garrett did not miss the opportunity to look at the townspeople and rob his modest dwelling. We collect everything that lies in plain sight and everything that is hidden from view on the shelves behind the cabinet doors and inside the drawers. Having finished, we get out through the open window and move along the beam to the building opposite. We open the window, quickly and often pressing one button, and penetrate into the attic. Crouching or slow step in a standing position, we pass by the cages with birds. Feathers are especially sensitive to jerks, so using them will instantly arouse the suspicion of nearby enemies. We interact with the picture and slowly run our hand under the frame on each side until we find a secret switch, which will be notified by a filled icon. We activate the switch and proceed to cracking the safe. By rotating the master key, we find the correct position for it and by pressing the corresponding button we fix the lock pin. The complexity of the lock is determined by the number of pins (maximum 5). And, therefore, the more pins, the smaller the fixation radius for each of them. Having completed the break-in, we take a shiny necklace from the safe and hear someone rushing along the roof.
We go outside, turn right and go around the corner. We take out the rope arrow from the box. We look up, open the equipment menu and select the only available type of arrows. We pull the bowstring and shoot at the beam wrapped with rope. Grab the rope and climb up. Erin turned out to be the disturber of the birds' peace. She offers to check which of us runs faster. We quickly rush after our partner, overcoming simple obstacles. A well-deserved victory goes to the lady.
The stone of light, located in the lower left corner, shows whether the shadow is hiding us or not. Light circle - we are easy to see, dark - we are almost invisible. Continuing to follow Erin, we cling to the corner of the building and, not being afraid of being discovered, we safely look out from behind it by pressing the appropriate button. After advancing behind the guards, Erin will use her own development - a claw that allows her to cling to bars and climb walls with ease. We'll have to act the old fashioned way. Use an instant dash to jump through the illuminated area. Then turn left and go up the stairs. After the conversation, crouching, we pass under the pipe. We move to the control point, break the winch and climb the stairs. Having penetrated inside through the window, we break open the door lock, go into the room and take the document “Viewer's Diary” (1/1) from the table. We leave through the window and go to the next building. With a slow step we pass to the stairs, so as not to scare the bird, and climb to the next floor.
The Primal Stone is located in the ceremonial hall of Baron Northcrest's mansion. Having made our way into enemy territory, follow Erin and use the dash to instantly overcome the illuminated path. We climb a little higher, we approach the guard from the back and rob him. We jump over the fence, crouching very slowly we pass through the water and make a dash through the illuminated area. We take out a water arrow from the box and hit the torch with it. We pass through the water, climb the stairs and watch how Erin kills a young and inexperienced guard. We stun the second guard and after talking with our partner, break open the door lock.
We pick up the bottle, hide around the corner in front of the illuminated area on the right side and throw the bottle in the place where we came from. The guard will be distracted, and we will be able to freely reach the boxes to the right of the gate. We climb up, move to the scaffolding and climb the rope. Below, behind the back of a motionless guard, are a locker, which is not only an excellent cover, but also serves as an autosave point, and a box with a water arrow. Also on the other side we find a chest with valuable items. Erin kills another guard and Garrett decides to temper her ardor by stealing a claw. The Baron, Aldus and Cornelius perform a ritual using the Primal Stone to summon the Primal. Garrett offers to leave this place, and Erin insists on continuing the task. As a result, Erin, trying to return her claw, breaks down and finds herself right in the center of the ritual. Trying to save her, Garret also rushes down.
Chapter 1: Blockade
Exactly one year has passed since the last events. The city was engulfed by a disease called "Darkness", which has already killed many people. The power of the Baron is increasing every day. The guards began to look like watchdogs, ready to tear anyone for criticizing the authorities and petty offenses. Having miraculously avoided meeting with them, we hide in the alley.

Valuable trophy "Ring with amethysts".
Each chapter has unique tasks, the completion of which promises a monetary reward. The Phantom style implies the complete or partial exclusion of other styles. Stunning and killing enemies are the Predator style, while extinguishing candles or torches, suspicions and detections are the Opportunist style. The chapter is considered completed in the style for which the most actions were performed.
Concentration allows you to slow down time and highlight all active points. The stock of concentration is limited by the scale, but you can highlight active points without it. We pass forward to the end, turn left and pick up the newspaper "On Curfew" (1/19), lying near the door. Having turned around, we run forward, jump over the fence and use the claw to climb the wall. We pick up a bag of food that restores health, and climb even higher.
In the distance, you can see the clock tower - Garrett's hideout. We jump down and sit out in the shadows. One of the guards has a document "Blockade Rules" (1/2) - we rob it. If we didn’t have time to do this right away, then we wait until the guard returns to the gate alone. We move to the alley on the other side and, turning left, we pass to the end. We jump over the wall and again find ourselves on the street. In jerks we get to the lamppost after the guards disperse. We quickly pick up the trophy "Amethyst Ring" (1/4), lying near the barrel on the left side and go back to the alley. We cling to the bars with a claw, climb the wall and jump down from the other side.
We break open the door lock, squeeze between the boxes and get out into the yard of the Stonemarket masons. We jump down from the right side and we pass into the backyard. There we will find a ladder - we go down to the basement. We get to a small room, select from the pallet the newspaper “The clock on the tower has risen again!” (2/19) and make our way through the tunnel behind the shelves.
There are three ways to enter the shop. There is a craftsman in the basement who is constantly moving from one table to another. On the left table is the document "Ligruve's Letter" (2/2) - we pick it up. In it, before the beginning of each paragraph, the numbers 7, 3, 9 are indicated, which are the code for the safe. The safe itself is hidden behind a painting in the corner next to a shelving unit. The site is lit, so we act quickly, but do not get carried away. It is easy to understand from the subtitles when the master moves to another table. We find the switch under the frame, activate it, set the necessary numbers in the combination lock and pick up the valuable trophy “Mask with Lightgrove Jewels” (2/4).
We rise to the first floor and go into a small room with a sleeping guard. We slowly go to the wall safe, break open a rather complicated lock and take the valuable Blackened Bracelet trophy (3/4). There should be no mistakes, otherwise the guard will wake up. Before this, it is best to save in the closet or through the main menu. It is not worth saving if the safe door is open, because after loading this save, the guard will miraculously wake up and find a burglary (hacked doors, safes and chests left open will alert enemies). We pass into the exhibition room, wait for the guard and follow him to the left side. When the guard starts to go back, we break open the showcase in the middle and pick up the valuable trophy "Mask with Jewels" (4/4). We go up to the second floor, go into the bedroom on the right side and pick up the newspaper “Who is watching the watchdogs?” from the bed. (3/19). Slowly and without jerks we get to the open window at the other end of the corridor and get out.

We select the newspaper "Blokada!" (4/19) lying on the bench on the right side. We open the window, penetrate the building and go outside through the door at the other end of the room. We use the jerk to slip past the guards. Moving forward, we will soon come across another couple of guards. We follow them to the corner, and then cling to the grate on the pipe on the left side with a claw and, climbing up, we get to the control point.
Clock tower
On the left on the table is the newspaper "Necklace" Star of Aldale "(5/19) - we pick it up. You can store unnecessary supplies in the chest. We climb the stairs and receive a message from Basso, delivered by the crow Jeniver.
stonemarket
We leave the tower and go to the Lame Burrik tavern, avoiding clashes with the guards. Things are not good for Basso, but he will always find work for us. The recently deceased Cornelius Graves always wore a ring on his finger. This ring is of interest not only to Basso, but also to the people of the Baron, who have taken control of the old factory where the corpses are delivered.
Returning back to Basso's shop, we pick up the newspaper "Treason!" (6/19). Opposite the entrance to the tavern is a merchant. First of all, we get a wrench from him. Rope arrows will not be superfluous. You can earn money by selling unnecessary supplies, searching for useful items in the city, or completing orders from Basso and other characters. We go into the tavern and from the counter we select the newspaper "Northcrest is indestructible" (7/19).
We get to the cemetery and meet with the Queen of Beggars. A representative of the lower stratum of the population makes it clear with hints that a dangerous force lurks in the city. Having received a point of concentration, we acquire an improvement for the skill "Intuition". For each donation to the Queen of the Beggars, we get one point of concentration. Each subsequent tip will be 150 coins more expensive than the previous one. We pick up the newspaper "Old Gods in the New City?" (8/19), lying on the table near the old woman.
Chapter 2: Ashes to Ashes
The main gate of the foundry is heavily guarded. We go down the rope and jump even lower. If we go all the way to the right, we will find a short path. A wrench is required to remove the bolts from the gratings. Long way - on the territory in front of the gate. Climb up the ladder to the left of the bridge and dash between the shadows to reach the door to the right of the gate. One of the guards will fall into a dream, and the other will walk in a circle.
We jump over the wall and run to the factory building. For a second, the image of Erin appears before my eyes. We climb onto the structure located on the left side, and from it we jump to the roof of the building. We pass to the end to the right, go down the stairs and take out the valuable trophy "In memory of mercy" (1/5) from the table drawer. From the table we take away the document "Coal Mine" (1/9). We get out of the building and grab the pipe adjacent to the factory building. We go up, move to the left along the ledges and penetrate the ventilation system.

Path to the roof.
We pass through the ventilation and jump to the stairwell when the guard leaves. We get down to the end down, open the door and move to the illuminated door on the other side. The guards will disperse very soon. One of them will remain in the illuminated area, so we take the document "Transportation of cadavers" (2/9) from the wall to the right of the door only when the guard is on the left side. On the right is a short path to the hook through the ventilation. In the absence of a wrench, we climb onto the box in front of the door and climb to the top floor when the guard is on the right side. We pass to the end to the right and pick up the Broken Glass document (3/9) from the wall. Jumping down, stand at the edge and cling to the hook.
Having moved to the production workshop, we jump down before we are in the field of view of the guard. We go all the way forward, select the document “Free Place” (4/9) from the table and break open the door on the left side. We slowly pass through the glass between the cabinets, pick up the document “Repair Notification” (5/9) from the table and go out into the corridor. Following the guard, we go down the stairs and immediately look up. We shoot at the beam with a rope arrow, climb onto the cabinet and, grabbing the rope, climb up. We jump to the last bridge and pick up the valuable trophy "Brooch: Daisy" (2/5). We continue to move along the corridor until we reach a small room, from where we pass further by the guard (s) and go up the stairs. We jump over the railing and make our way through the ventilation system into the workshop. On a stack of books a little further from the door is the document "Mysterious Letter" (6/9) - we select it. To the left of the shelving is a wall safe. We set the combination 314 and pick up the valuable trophy "The Soul of a Mechanical Man" (3/5). We leave the workshop through the ventilation shaft on the right side.
We return to the stairs and get out into the corridor. Avoiding a collision with the guard, we get to the blocked door and pick up the document "Forbidden Zone" (7/9). In front of the sleeping guard is a chest lined with broken glass on all sides. We slowly pass through a noisy area or simply jump over the railing. We break open the chest, take out the key to the engine room from it and do not forget to close the lid. We pass into the next room, climb the wall with the help of a claw and wait in a dark area for a good moment to pick up the document "List of corpses" (8/9) from the pathologist's table. We return to the locked door, open it with the key and, climbing up, grab the hook.
Once in the next part of the plant, we jump down and follow forward. We watch how the General "Thieves Catcher" removes the ring from the body of Cornelisus. We pass further and get out upstairs. We pick up the document "Search Instructions" (9/9) from the wall column. We go into the room behind us, where under the grate above the conveyor belt lies a valuable trophy "Ring with diamonds" (4/5) - we pick it up. Returning back, with jerks from the countertop to the countertop we move to the other side. We make a jerk at the moment when the furnace door of the furnace closes. Next, we climb the wall on the right side and through the ventilation we get to the office of the foreman. Hack the wall safe by placing the elements according to the image. We pick up the valuable trophy "Ring of Cornelius" (5/5). We neutralize the unexpectedly appeared General and block the door.

Solved puzzle.
Break open the door and go outside. When the guards agree and disperse to their places, we move to the right side along the dark area between them. Continuing to move along the right side, carefully approach the gate and climb it with the claw. We rise along the pipe, move to the right and get out. We go to the right, jump to the roof of the building and fall down. We hide behind the rack and wait until the guard checks what happened here. Then we follow him and quickly climb onto the structure on the right side when the guards leave. We jump from surface to surface, from beam to beam and thus get to the building. We penetrate inside through the window and crouching we pass into the next room.
Stowmarket
The merchant has new tools - a razor and wire cutters - we get them. Meet Basso in Black Lane. He will introduce us to the ring's customer, Orion, who opposes the Baron's regime. We agree to get a unique book for him, located in the House of Flowers brothel. The House of Flowers is a rather secret place and not everyone is allowed to go there. Erin used to work in a brothel and naturally knew how to get there.
riverside
We leave for the new district of the City and get to the mill. Having made our way inside, we jump over the boxes, go down and activate the secret switch on the wall a little to the right of the boarded up passage.
We climb up and press the wall button at the corner on the left side. After disarming the traps, we climb the ladder and continue climbing the monolithic ladder, simultaneously activating the secret button on the wall. Open the hatch by pressing the button on the support, and jump down. Once in a strange place, we get to the glow emanating from Erin. Having overtaken the girl twice, we tear off posters with her image from the walls and the last one will be a poster with our portrait. Returning to reality, we activate the button on a similar portrait and take the medallion from the cache.
We acquire wire cutters, if we have not done this before. We get to the indicated point, go down and go all the way to the right. We pull the lever on the support and make our way to the House of Flowers along the lowered bridge.
Chapter 3: Dirty Secrets
The guard leads the rich man to the House of Flowers. It is not necessary to follow them, so we go forward to the wall and climb the pipe on the left side. We use wire cutters to cut the shield rope and thereby unlock the door below us. After going there, turn right and climb up the box. We select the valuable trophy "Dragonfly" (1/5) from the floor and continue to move forward. We jump down and down and get out to the stairs. If necessary, before the last cliff, we release a rope arrow into the upper beam and safely descend the rope. Let's proceed to the lower floor and, based on the experience of the client, we will make sure that you can enter the House of Flowers only by invitation. We do not need it: with the help of a hook we climb over the wall on the right side.
We open the doors, pulling the levers on the left side, and freely penetrate into the brothel. We move in a squat position so as not to wake the sleeping guard. When the girl goes to the right, we pass into the hall through the closed curtains in front and we see that there is a guard on the left against the wall. We make a dash to the right side in order to slip through the illuminated area unnoticed. In a circle, through the center of the hall and the right room, another guard is constantly moving. Having guessed the right moment, we move to the stairs on the other side. We do without jerks, otherwise we will scare the bird. If you do not want to wait until the guard makes a circle, then you can try to go through the room on the right side. However, it should be borne in mind that there is a guard there, also moving in a circle. We rise to the span between the floors and, using the hook, climb the wall. We select a valuable trophy "Ring with emeralds" (2/5), lying among the ropes and go back.

To the attic with a valuable trophy.
Quickly and without a jerk, we pass into the first room on the left side on the top floor, when the guard approaches the fence. From the chest of drawers in the corner we select the document “Coil Combination” (1/4). We leave the room and again wait for the guard to approach the fence. We pass to the office of Xiao-Xiao and, after the guard returns to his previous position, we take the document “List of constellations” (2/4) from the table in the corner. We go to the waiting room, select the document “Finding a combination” (3/4) from the table and break open the cabinet door. After going inside, turn right and pick up the document “Diary of Madame Xiao-Xiao” (4/4) from the table. We grope and activate the switches under the picture frame on the opposite corner and get access to the secret passage.
Having descended the stairs, we turn right and pay attention to the gap in the wall, which allows us to observe the joys between clients and courtesans. We go down even lower and find a podium with a niche for a medallion. After the appearance of a new task, we look at the symbol on the wall and automatically remember it. We return back to the wall with a gap and look through it. The symbol is on the top left. We pass further than the podium and climb the stairs. We look into two more rooms: in the first, the symbol is on the top right, in the second - on the top left. We go to the podium, select the rings and rotate them to arrange the symbols vertically in the center in the upper half of the medallion. Then it remains only to put the medallion on the podium.
We jump down, go around the wreckage and make our way through them. Further, we go to the left and, having crouched, we pass forward. The trap has been activated - we neutralize it by pressing the button on the wall. We go down the stairs and get to the door in the far left corner. We break it open and go down. We slowly move towards the podium, simultaneously looking around and remembering the symbols depicted on the walls. We place them in their positions, put the medallion on the podium and take the valuable trophy "Ancient figurine" (3/5). Climb back up and activate the wall button. We get to the tower and jump out of the broken window. We go down in any available way and find ourselves in the scriptorium. We interact with the bookshelf on the right side, grope for the book-switch and get into the secret room. From the dishes of the statue we take away the valuable trophy "In memory of the stonemason" (4/5).
After leaving the secret room, we go to the far right corner. We interact with the bookshelf, run our hand along the row and look for the switch book. Let's go down to the tower, get out of it on the left side and soon find the first valve. We rotate it to failure clockwise. We go down to one tower and from it we rise to another. We jump down, go outside and rotate the valve to failure counterclockwise. We go back inside, climb up and return to the previous tower. We pass along the bridge on the right side, rotate the next valve to failure clockwise and climb the stairs. We run all the way to the left, jump down the stairs and climb to the very top. We accelerate and jump to the window of the tower. Interact with the podium, arrange the symbols in their places and place the medallion in the niche. We pick up the valuable trophy "Ritual Book" (5/5).
We climb up the rope, move to the next tower and go down the rope too. We penetrate into the scriptorium, go to the right and get to the tower. We avoid a collision with the guard by waiting inside the tower. Climbing the stairs, we will notice another guard on the left and hide behind him. We wait for the departure of the enemies, climb the stairs and get to the last guard. We go around it, climb onto the boxes and, grabbing the rope, climb up. Following the control points, we get out of the catacombs. While quietly watching the brawl, we accidentally become drawn into it. We again manage to outsmart the General and leave him with his nose.

Baron Northcrest.
Stowmarket
With the last of her strength, Jeniver flies into the clock tower and dies in our arms. My first thoughts are that Basso is in trouble. Unrest is growing in the city. The Lightforged are preparing to riot. We go to the tavern and see how Orion is trying to find a book of rituals. The Thief Catcher dragged Basso and several Lightforged into the fortress, among which was Jacob, who was preparing an assassination attempt on the Baron and had carefully studied the Fortress before that. Having received valuable information, we give the book of rituals to Orion and set off to rescue the allies.
Chapter 4: A Friend in Need
Apparently, Jacob will not tell anything, for the rebellion has reached its apotheosis, and the Lightforged have begun to free their people from the Fortress. There is another person who knows the Fort like the back of his hand - Eastwick. He is the creator of the monumental structure. Following the signs, we get to the wall, which you need to climb with the help of a claw. On the left is a beam for a cable boom. We release the arrow, go down and go to the lamppost on the left side. We take away from under the bench a valuable trophy "Ring with lapis lazuli" (1/6). We go back and get to the architect's mansion. There are many ways to get into the house, but we will choose the simplest and most effective. We jump down, go to the left and jerkily go around the building so that the dog does not have time to notice us. At the top there is a beam - we shoot at it with a rope arrow and climb up. We jump to the mansion, wait for the crossbowman to leave and enter the house through the door on the balcony.
Turn right and go up to the third floor. We carefully pass behind the guard and use a razor to cut out the valuable trophy "Excess of the Void" (2/6). The crossbowman will also enter the house and go to the main staircase - let's follow him. We go down the stairs about halfway and jump over the railing to the right side. It is also worth considering that on the ground floor a guard moves around the stairs. We go into the office and be sure to close the door behind us. We pick up the document “Letter Madeleine” (1/6) from the table. In the corner of the adjacent table on the left side there is a secret button - activate it. We break open the wall safe and pick up the valuable trophy "Morendram Medal" (3/6). We go to the library on the second floor. We climb onto the table, then onto the bookcase and move to the other side. We will observe the guard and study the route of his movement. We jump down, slowly go through the area with glass and interact with the bookshelf. Before this, we make sure that the maid and the guard do not look in our direction. We quickly find the switch, activate it and find ourselves in a secret room.
We use the elevator and go up to Eastwick's office. The architect is hanging from a noose - this explains his unwillingness to cooperate with the guards. We pick up the document "Fortress in miniature" (2/6) from the bottom shelf of one of the cabinets. Climb the stairs, go to the middle and interact with the painting. We pass our hand under the frame and alternately activate the detected switches. We jump down and interact with a miniature fortress. It must be located exactly like the original. We start from the lowest compartment and expose the side with three windows. Further, from bottom to top: three windows - eight windows - six windows - two windows. We pick up the documents "Plan of the Fortress" (3/6) and "Cipher of the Big Safe" (4/6) that appeared on the left side. The Shieldman broke down the door, which means it's time for us to get the hell out. Accelerated rush only forward and break away from the chase.

We stock up on everything you need from the merchant, climb onto the boxes on the right side and climb the rope. We jump into the attic and crouching, moving along the narrow passage. We get to the fortress, go inside and, turning right, jump down. We move along the pipeline, overcoming simple obstacles. Having successfully made our way into the engine room, we pass through the ventilation system and find ourselves in a smoky room. You have to act quickly so as not to suffocate. Crouching, we pass under fire and turn right. Before the next fiery barricade, turn left and jump up. It remains only to reach the door and unscrew the valve. Having reached the boiler room, we go all the way forward, along the way taking the valuable trophy "In memory of a soldier" from the guard's hand (4/6). We unscrew the valuable trophy "Fortress" from the wall (5/6). On the elevator we go up to the prison.
From the table we pick up the document "List of prisoners" (5/6). When 13-14 meters remain until the next checkpoint, the document “Letter to the Illuminated” (6/6) will lie on the floor next to the body - we select it. We pull the lever to the right of the gate, free Basso and go to the most secure storage in the world.
When the elevator is in place, we get out into the mine through the opened upper hatch. We jump over to the next cabin, pull ourselves up to the ledge and through the ventilation shaft we get to the room with the safe. We pull the lever, as quickly as possible, alternately press the two buttons at the corners of the safe and set the first combination (319), which consists of the first digits of two-digit numbers in the “Large Safe Cipher” document. After we try to set the second combination, the General will appear and shoot us in the hand. Hiding from the guards on the upper level, turn around and go back. After jumping up, we turn around again and climb the stairs on the right side after the guard leaves. Then we pass to the right and from the last box we select the valuable trophy "Bracelet: slate snake" (6/6). We go down from the other side and jerkily get to the safe. The guards are alarmed, so they move quickly and are in a state of special vigilance. We enter the second combination (018) and pick up a fragment of the Primal Stone.
We collect flowers, open the door and follow Erin. She will give a tip to Moira's shelter, located on the island and keeping a lot of secrets and secrets.
riverside
Stonemarket has been taken over by the Lightforged, but that doesn't mean we're free to roam the area. Avoiding collisions with local residents, we get to the southern Baron Avenue and immediately go around the guards on the left side with jerks. We pass to Riverside and go to the Siren's Rest tavern. Basso will agree to take us on his boat to Moira's orphanage. Having bought everything we need, we go outside and set sail to the place that Erin mentioned in our vision.
Chapter 5: Outcasts
After reaching the main gate, climb the wall on the right side and head towards the building. Having passed around on the left side, we unscrew the valuable trophy "Moira's Shelter" (1/6) from the wall. Entering the building, look through the hole in the door. We move to the reception table and select the document "Journal of Visits" (1/42) lying to the left of it. We go up to the second floor, break open the closet and pick up the document "New Patient" (2/42). We go on the right side and go to the men's department.

Map with useful finds.
3 - the document "Report on the hood in the shower" (3/42) inside the drawer.
4 - the document "Absence" (4/42) inside the drawer. In the same room, rotate the valve to failure clockwise.
Returning to the corridor, we go down the stairs as long as possible and select the document "History, 2" (5/42). Returning back, we pass through the doors, access to which was obtained after the opening of the lattice.
6 - we take the document “Headaches” (6/42) from the cart.
7 - from the cart we select the document “Archivarius (7/42).
8 - we take the document “Chamber numbers” (8/42) from the table.
9 - from a small table in the corner we select the document "Progress Report" (9/42).
10 - the document "Night watchman on duty" (10/42) hangs on the wall.
You can get to room "A" through the passage in the next room. Near the bed frame lies the key to the women's department - we pick it up. In the corner on the chair is the document "Cache" (11/42) - we select it.
12 - we select the document "History, 4" (12/42).
From room "B" we look through the hole on the wall and see a picture on the wall of the corridor. We leave the room and with the help of a razor we cut out the valuable trophy "Aversion to pleasantries" (2/6) from the frame.
We move to the reception room, avoiding a collision with an invisible night guard. You can recognize it by the distortion of the air and, of course, by the loud clatter. The document "Results" (13/42) appeared on the table - we pick it up and go to the women's department.
Let's look into the elevator shaft and shoot a rope arrow at the beam above. We go down the rope and crouching we jump even lower. We select from the floor the document "History, 2" (14/42). We climb the cabinet on the left side and find a valuable trophy "Brooch: Rose" (3/6) on the pipe. We rise to the next floor by the stairs. We use the key and enter the room. In the absence of a key, we go around the room on the right side and go through the gap in the grate. From the wall we take away the document "Writing materials" (15/42). We also search the drawers of the table. One of them contains the document "Voices" (16/42). We return to the top floor.
13 - the document "Key to the doors of the department" (17/42) hangs on the wall. We insert the key into the socket and unlock the door. In the room, rotate the valve to failure clockwise and go through the door on the right side. We go down the stairs on the other side and find ourselves in the dining room. The document "Entertainment" (18/42) is attached to the column. We go backstage, pick up the mirror and, turning around, pick up the document "Unrest in the dining room" (19/42). We rotate the valve to failure counterclockwise and leave the dining room.
14 - we take the document "Lessons" from the wall (20/42).
15 - in the room is the document "Heat and Cold Therapy" (21/42).
16 - near the bed frame is the document "Notes of a Spy" (22/42).
17 - under the frame is the document "Huntfield's disease" (23/42).
18 - document "Report: Patient #18" (24/42).
To open the door of the central room, you need to cut the shield rope in the corner marked on the map as "C" with wire cutters. Collecting the documents "Another Outbreak of Aggression" (25/42), "Patient Records" (26/42) and "Patient Transfer" (27/42). We get to the previously blocked passage, we pass by the carriages and we select the document "History, 3" (28/42) lying in front of the rack. We squeeze through the rubble, pick up the document "Confidentiality" (29/42) from the wall and go down the stairs to the elevator shaft. We jump over to the other side, turn left and go down. We go to the treatment center.
We move past the cameras and, having reached the corner, we go into the control room. From the table we take away the document "Note of the Fugitive" (30/42). From the drawer we get the document "Lock on the elevator" (31/42). We climb onto the cabinet, neutralize the trap and from the cabinet itself we take away the document of the Baron "The Curbing of Primal" (1/13). We leave the room, go a little to the right and from the wall next to the door we find the document "Sensory deprivation" (32/42). We get to the generator room, pull the lever and thereby restore the power supply. We return to the control room, press the button and initiate the opening of all cameras. We leave the room and go into the only available chamber. From it through the ventilation we go to the next chamber. Attached to the wall is the "Adjustment" document (33/42). From the drawer on the right side we get the document "Request for transfer" (34/42). We select a syringe from the chair and, on behalf of Erin, we observe how they are trying to pump Primal out of her.

Queen of the poor.
One of the patients is moving along the corridor. Taking advantage of the moment, we move to the next room. The document “Sterilization” (35/42) is attached to the end of the cabinet - we pick it up. There is a safe on the wall perpendicular to the door. The combination for him is 731. Each number is the number of short blows coming through the pipe. If we do not have time to open the safe and take everything that is in it, then we do it in two approaches. Do not leave the safe open, as this will arouse suspicion in the patient. Also, from the drawer a little to the left we take the document “Knocking in pipes” (36/42). Inside is a valuable trophy "Ivory Ring" (4/6). Through the ventilation we pass into the next room. We pick up the document "Lobotomy Room" (37/42), which is attached to the device. One more document - "Hydrotherapy" (38/42) and "Shock Therapy" (39/42) - can be found in the next two rooms. To pick up these documents, you have to distract the patients. The first by shooting a hunting or blunt arrow at the switch, the second by putting out the fire with a water arrow.
We return to the penultimate room with the patient. We jump down when the elevator is at the top. Under it there is a grate - open it with a wrench. We move forward, jump down and unscrew the bolt at the nearest grate. We select the document "Treasure" (40/42) and get out of the ventilation. We pass to the stairs and go down, skipping the geek forward. We pull the lever, go to the right and pick up the document “Prison Rules” (41/42) from the aisle. Next, from the table we select the last document “Report: Aggression” (42/42). We pass to the balcony and jump over the railing. We climb to the left side. We have a rope in front of us, but we need another one, so we release a rope arrow into a free beam. We jump from one rope to another and find ourselves in the top position. We turn right and take the valuable trophy "Mechanical Eye" (5/6) from the suspended cage. There are many enemies here and they each move along their own route. We use concentration to a minimum and try not to make noise. We jump down, go right and go down. We go forward to the end, carefully push the vase and pick up the valuable trophy “In memory of the child” (6/6) located under it. If you can’t act carefully, then we break the vase after making sure that there are no geeks nearby.
No less caution must be exercised when leaving the correctional department. As slowly as possible, we sneak past two geeks. Then we squeeze through the debris and open the bars, pulling the levers. The geeks will try to stop us, but after a moment they will disappear. We go forward and slide down. We continue to move forward, go upstairs and, turning around, get to the room. After another memory, we leave the room, jump over the railing and go to the next room. We climb up the bed frames, turn around and jump to a stable surface. We open the lock leaking through the poster, open the door and, finally, in the last room we find Erin. We interact with her, and this is where our adventures in the shelter come to an end.
stonemarket
After leaving the clock tower, we go to the southern part of Baron Avenue and get to the Market Street. Almost reaching the enemies (or the control point), we stand under the arch and release the rope arrow into the beam above the open hatch. Having risen up, we go around the floor traps and, having broken the door, we go outside. We unscrew the grating bolts, go through the ventilation and get out to the Ninth Precinct Square. We move to the other side, go into a small room and go down the rope. Outside we will meet a merchant - we get blunt and rope arrows from him. We pass even further to the wall, climb to the ventilation on the right side and freely get to the gate.
Chapter 6: Loner

Column with a valuable trophy.
The Lightforged cross the last frontier on their way to Northcrest's mansion. Once in the courtyard of the mansion, we slowly walk through the water and follow the guard to the left. He will go up the stairs, and we will move to the left and again we will pass through the water next to the waterfall. We quickly climb the column with the help of a hook, until the dog has time to smell us. We jump over to the opposite column and from the nest we select the valuable trophy "Rusty Tears" (1/6). Let's wait for the guard to go in the opposite direction, jump down and move into the garden. The crossbowmen will go up. We turn left, go down and rotate the valve in the room to failure. Turning off the water, right from here we get out through the window and climb even higher. With a wrench, we unscrew the valuable trophy "Statue of Elias Northcrest" (2/6). Turning around, on the right side we see an ordinary guard and a captain. On the left is a crossbowman who constantly changes position. Also, another guard periodically moves from one staircase to another. After making sure that no one sees us, we quickly get to the captain of the guard and pull off the document “Map of the courtyard” (1/12) from his belt.
We move around the mansion on the left side. Constantly keep to the left side, avoiding meeting with the guards. Illuminated zones cannot be avoided, so we use time-tested jerks at the right time. Having reached a dead end, we climb onto the pallets and look up. We shoot with a blunt or hunting arrow at the knot of the suspended box. We climb onto the box, pull it up to the pipe and shoot with a rope arrow into the beam. Climb up the rope and enter the attic through the window.
We leave the attic, turn right and pick up the document “Guard's Letter” (2/12) from the table. When the guard finishes fiddling with the trap, we sneak to the stairs and go down to the second floor. The first door on the left side is equipped with a trap. The area ahead is also completely screwed up with floor traps. There is only one thing left - the bedroom on the right side. From the table in the corner next to the bed we select the document of the Baron "The Awakened" (2/13). We climb onto the bookcase, the pipe, then unscrew the grate bolts and get out into the corridor. Disarming traps is prohibited, as this is fraught with getting an opportunist, so we carefully jump to the center of the tile on the far right in order to be exactly between the wall mechanisms firing arrows and not take damage. The method is doubtful, since it is not always possible to land where you need to. If you wish, you can get into the part of the corridor fenced with traps through the library on the first floor.
On the left is the locked door of the library, we will return to it a little later. In the meantime, we continue to walk along the corridor and get to another area with floor traps. On the way, do not forget to look into a small room on the right side and pick up the document “Letter of the Manager” (3/12). The next door on the right side is equipped with a trap, and a painting hangs on the left. We grope for two switches under the frame, activate them and get into the secret room. In the center is a vault with disc mechanisms on the sides. Let's start with the ones on the right side. The upper disk is installed as it should, so we do not touch it. You can verify this by looking inside through the hole on the back wall of the vault. We turn the second disk once counterclockwise, the third - once clockwise and the fourth - twice clockwise or counterclockwise. Let's move on to the other side. We rotate the first disk from above once counterclockwise, the second - twice clockwise or counterclockwise, the third - once clockwise and the fourth - once counterclockwise. We pick up the valuable trophy "Heart of a Lion" (3/6).

Properly positioned disc mechanisms.
We return to the locked door of the library, break it open and go to the arch through which you can see the stairs. There is a beam at the top - we shoot at it with a rope arrow. We climb up and jump onto the bookcase against the wall. We jump to the adjacent low cabinet, pull ourselves up to the ledge and move a little to the right. We remove the bolts from the grate, raise the grate and find ourselves in the bedroom. From the bedside table to the right of the bed we select the document of the Baron "Vivienne" (3/13). We freely go out into the corridor, since the door will block the wall mechanism and we will not receive damage. We go around the floor traps through the opposite room and return to the library.
Again we pass to the arch, wait for the guard and follow him. He will turn left, and we will go to the last bookcase and extract the Coronation document (4/13) from the book. We catch up with the guard and continue to move after him. He will pass by the table on which lies the document "Mansion Plan" (4/12). Carefully go down the stairs on the right side and turn right. At the table is the captain of the guard and an ordinary guard. The latter periodically moves from place to place. When he stands with his back to the fireplace, we get close to him and pull off the document "Annabeli's Note" (5/12) from the belt. The captain won't notice us, but the other guards, including the one that follows us down from the second floor, will see us if they are nearby. Therefore, there is no need to rush, but wait for the most opportune moment to commit the theft. We go around the table in the dark areas and climb onto the bookcase behind the captain on the other side. We jump down already from the side of the table and extract the document of the Baron "Primal" (5/13) from the book on the shelf. We return to the opposite end of the library, go out into the corridor and be sure to close the door behind us.
We turn right and go into the first room on the right side. From the coffee table we select the document "Dismissal" (6/12). We leave the room, turn left and get to the fork. At the other end of the illuminated corridor stands a guard. We make a dash to the door on the right side. We go into a small room, climb onto a rack, a pipe and through the bars we get into the next rest room. Having jumped down, we turn around and take out the document of the Baron "The Book" (6/13) from the book on the shelf. On the table near the sofa lies the document "Secret Vault" (7/12). In the corner is a wall safe. The code for it is indicated in the document "Annabeli's Note" - 889. Inside there is a valuable trophy "Ring with sapphires" (4/6).
We leave for the second floor of the library, break open the second door and go along the corridor to the floor traps. Using the hook, we climb up to the grate on the left side and penetrate into the bedroom. We select the document “Burned Letter” lying by the fireplace (8/12). On the nightstand to the left of the bed is the Baron's document "Sterility" (7/13). We open the cabinet door and take out another document of the Baron "Reunion" (8/13) from the book. We make a circle through the library and through the vestibule to the research tower.
We pull up to the ledge, jump from the other side and climb up the pipe. We shift to the right, we rise higher and we shift to the end to the left. Having got out to the landing, we climb up the frame of the elevator shaft. Having reached the stairs, we go down and from the book on the chair we extract the Baron's document “Deathbed Confession” (9/13). We go up to the Baron and find out that his brother Aldus, aka Orion, kidnapped Erin from the orphanage and began preparing for the ritual. From the flow of new information, Garret does not notice how the Baron sends him straight to the Lightforged, who have already broken into the mansion and are eager for reprisals.

General "Thieves Catcher".
Going down, break open the door and follow the enemy. We are waiting in a dark corner and at the right moment we jerkily move to the other wing of the building. After passing into the corridor, we move forward and around the corner we will find a closet. We climb on it and along the ledge we get to the ventilation system. On the right at the very end lies the document "List of Works" (9/12). We continue to move along the ventilation in the opposite direction. After getting out into the room, from the book on the shelf we extract the document of the Baron "Ends in the Water" (10/13). We return to the ledge and wait for the Illumined One. As soon as he appears, we jump down and follow him along the corridor to the barricade. We keep our distance, because then he will turn around and go into the room. A picture hangs to the right of the passage - we cut it out and get the valuable trophy "Married old maid" (5/6). We return to the lobby, jump over the fence and jump from the ledge to the interior element. Avoiding meeting with uninvited guests, we jump from the right side and move to the first floor. We pick up the document “Damaged Wing” hanging on the wall (10/12). We leave for the room, hide under the scaffold and make a dash through a small opening between the boxes. Being outside, we immediately get to the far right corner, activate the wall button and find ourselves in a secret passage.
We pull the lever, go down to the laboratory and from the very first table we pick up the Baron's document "Lions of Industry" (11/13). On the other table is the document "Redistribution of Strength" (11/12). From the box in front of the stairs we select the Baron's document "Swan Song" (12/13). We go down, pull the lever and thereby start the device. On the chair is the document "Laboratory Repair Report" (12/12). We climb the stairs to the very top, select the document of the Baron "Progress" (13/13) from the box and shoot the rope arrow into the beam. We go down the rope and jump to the other side. We take away the valuable trophy "In memory of the braggart" (6/6) from the box and return to the device. The left valve is responsible for changing the position of the structure, the right one - for the speed of its rotation. We install the structure in the position at which a characteristic rattling will appear. Then we accelerate the structure with the right valve and observe the deepening of the cracks. We repeat the steps until the vault is completely destroyed. We pick up a fragment of the Primal Stone and, after a series of visions, we climb up the pipe. Another meeting with the Thief Catcher ends with our escape.
We run forward to a dead end, turn right, and crouching, we get out to the pier. We get to the other end, carefully maneuvering between the burning debris. We strike the mount with a baton, go back and go across the boat. We continue to jump over the dips, climb onto the scaffolding on the left side and climb the rope. We jump down to the roof and use the claw to get into the building through the pipe. We quickly go down, go outside and climb the building. We grab onto one rope, then another and jump to the guard post. We slowly approach the stairs and after the collapse we climb the rope. We run outside, turn left and rush along the safe sections of the roof. Jump down the left side and squeeze through the rubble. We move along the right side and along the collapsed support we get to the base. We turn left, cross to the other side and jump up. We pass along the beam, go around the fiery barriers on the right side and go through the gate. We run into the house on the left, climb onto the closet and through the upper window we get out.
stonemarket

From the window to the bridge.
We are met in the Clock Tower. The Queen will ask and warn that if Erin dies, the City will disappear from the face of the earth. We connect two fragments of the Primal Stone and go for the third one to the cathedral to Orion. Before that, be sure to buy plenty of rope arrows. The street in Grandmauden is well lit because of the blazing buildings. Upstairs in front of the bridge we notice a winch and two beams. We release the appropriate arrows in them and go upstairs. We move to the second bridge and knock out the third one, which is on the right side, with an ordinary arrow. We rise along the second rope and jump into the building through the window. From the window we jump over to the third bridge and, after passing through the building, we get to the perpendicular street.
Chapter 7: Secret City
We get out and go forward at the fork. After jumping down and being in front of the table, we turn right and penetrate into enemy territory. When the conversation between the two guards on the right side ends, one of them will remain in his place, and the second will begin to move around the territory in a circle. Our task is to snuggle (just snuggle, otherwise other guards may notice us) to the table and, watching the motionless guard, quietly move into the building. Factors affecting success: a flash of lightning, the distance of one guard and the look of another. From the drawer of the table we pick up the document "Note from the warehouse" (1/4). We shoot a rope arrow at the upper beam and climb up. When making a dash through the illuminated area, we follow the gaze of the guard and do not forget about lightning flashes. We get to the opening above the gate and through it we penetrate into the vestibule.
We hit the bell with a club and, while the door opens, we hide near the boxes on the right side. Curious guards will want to check why the gate is open. When they go inside, go outside and go right. We climb onto the topmost box, shoot a rope arrow into the beam and use two ropes to get to the second floor. Follow the guard inside and hide in the closet. Having left the room, he will no longer return to it. From the table where he stood, we select the document "Smuggler's Letter" (2/4) and also go outside. We go down the stairs and dash past the illuminated area, after making sure that there is no one on the balcony above us and behind the wall. The guard will descend after us - we move after him, avoiding meeting with another guard. We go down even lower and stop in front of the illuminated area. Now we are closely watching the enemy, constantly moving from one end to the other, and the guard, who is on the balcony above the control point. We get to the lever, pull it and, after waiting for the elevator to arrive, we go down to the loading dock.
Along the way, something goes wrong, and the elevator will fall into place. Without thinking twice, we cling to the ledge on the wall, move to the right to the last grate and go down. Turning around, we jump even lower. We rotate the valve to failure clockwise and quickly move to the other side of the bridge. We pass into the cave and in a small gap between the box and the rock on the right side we find a valuable trophy "Artifact of the City" (1/4). We return to the place where we went down the cable of the claw and go into the cave. Once at a dead end, turn around and go through a small passage near the boxes. We get to the illuminated area, climb onto the ledge and go around the floor traps. After jumping from the last beam, we open the cabinet on the left and take out the document "Pantry" (3/4) from it. We continue to move through the cave until we get out of it.
We go up the stairs, climb up the boxes on the right side and climb over the barrier when the crossbowman passes to the left. A guard with a torch and a guard in the cave itself can prevent you from entering the cave unnoticed. There is no hurry, so we do everything for sure. After entering the cave, turn left at the fork and wait for the guard to pass us from left to right. We get to the bridge and go down under it on the left side. There we will find the document "Marauder's Note" (4/4). You can already climb up with the help of a hook along the wall on the other side. Crouching, we pass into the outer catacombs and freely move into the inner catacombs.

Valuable trophy "In memory of the old man."
Geeks are walking around the bridge. At the very beginning, we turn left, go down and release the rope arrow into the beam. Using the rope, we bypass the failure, break open the door and go inside the room. The chest is equipped with a trap, so first we neutralize it through the panel on the wall on the right side. We take out the valuable trophy "Bracelet with a bronze head" (2/4) from the chest. Once outside, turn left and jump down. We rise along the rope and climb higher to the valve when the geek moves away from it. We follow the enemy: as soon as he moves away from us as much as possible, he will briefly linger in one place. This is our chance to quickly and without attracting attention, unscrew the valve to the end and thereby open the gate.
We climb the stairs to the very top, turn left and turn the valve to neutralize the floor trap on the intermediate floor. Returning to it, we climb higher and higher up the stairs and ledges. We go around the grate from above, wait for the end of the conversation between the guards and jump down. The dialogue will continue. After its completion, follow the guard with a torch. Climbing the stairs, we pass through the gap in the wall on the left side. We get out of the pantry and get into the lair of the Lightforged.
Orion is engaged in healing in the rotunda. Erin is also there. We go around the dark area on the left side (through the bars in the corner you can get to the merchant). Slowly we pass on the glass and jerkily move to the other side. First you need to wait until the two guards finish the conversation and move on. Also, the crossbowman on the second floor must not be allowed to see us. We pass through the entire building and get out on the other side. Just before the exit will be two guards. One of them will doze off in a chair. There is a large box ahead - we approach it from the right side, climb up and, using the rope, jump onto the wooden platform on the right side. We pass along the beam and select the valuable trophy "In memory of the old man", lying between the stems of plants. We climb the wall, enter the rotunda and watch the healing of the Lightforged Primals oozing from Erin. From our appearance, the girl awakens and everything around us slows down. We select the first fragment of the Primal Stone and go to the right. Bypassing the obstacles, we will soon get to the second fragment. Combining them, we pass to the center and take the necklace from the hands of Orion. Orion manages to escape, taking Erin with him, thanks to the appearance of the General. This time, the fight is unavoidable.
The easiest option is to immobilize the Thief Catcher (the share of the Predator style will be 33%). Let's use all the arrows that we have. Explosive and jagged arrows will by far deal the most damage. We try to shoot exactly at the head of the enemy. A couple of explosive arrows can be obtained from the box on the pedestal in the center. To do this, we wait until the General starts firing from his weapon or briefly disable him with a suffocating arrow or a light bomb. Finally, having defeated the Thieves Catcher, first of all we rob him. In his bag in the middle is a valuable trophy "Ring with Amber" (4/4). We rotate the valves on each side, break open the door lock and leave the territory.

Box with explosive arrows.
The second way is much more difficult. First things first, let's steal a valuable trophy from the General's belt. The right bag is in the middle. We wait for the General to start firing from his weapon or briefly disable him with a suffocating arrow or a light bomb. First, we try to sneak up to the enemy as close as possible and only then use the appropriate arrow. This will save us a few precious seconds. We move on to a more difficult stage - opening the door. We unscrew the first valve, but not completely. We leave quite a bit. A guideline for when to stop is the grate on the door. We go to the second valve and unscrew it to the end. After that, the General will begin to be active in shooting. We quickly return to the first valve and completely unscrew it. We sit out in a secluded place, but still we do not forget that the cat cried in safe places here. Therefore, at the first danger, we are preparing to make a breakthrough to the side. Most likely, the door will be lit by a torch - we extinguish it with a water arrow. We break open the door lock and leave the territory.
Chapter 8: Morning Light
While we were dealing with our sworn enemy, the General, Orion and Erin moved far enough away from us. The rails will lead to a dead end, after which we turn right and, crouching, go through a small passage. Having got out from the other side, we go around the geek with a slow step and get to the chest. We break open the lock and take away the valuable trophy "Funeral Bell" (1/2). Returning a little back, with the help of a claw we climb the wall and go left. The geek at this point should be on the right side. If it is on the left, then it will not be possible to bypass it. Having reached the cliff, we are in no hurry to jump down. The geek must be on the left side, i.e. we'll have to wait until he passes us.
After observing the ship built by the Lightforged, we continue to move along the tunnel. At the fork we turn right and through a small passage we get out to the abyss. We go around it through the pipes on the wall. Following the guard, carefully step on the surface with fragments. The guard will go back on the right side, so we can hide behind the boxes in the center. We go up the stairs, go into the room and be sure to close the door behind us. Behind the box on the right is a passage that will lead us outside.
We climb over the boxes of the barricade and through the scaffolding we make our way aboard the ship. We pass to the loading deck and rise through the pipes to the upper level. We look through the keyhole of the first door on our way. When the guard passes from left to right, we go outside and be sure to close the door behind us. We hide between the boxes in a dark area on the right side. We penetrate into the ventilation through the grate next to the place where the guard stood. Having got out from the other side, we go to the right and we rise along the stairs. We climb over the wall and find ourselves in an elevator.
Having gone down to the middle deck, we turn right and observe the guard in the room through the keyhole. Both guards - opposite the elevator and inside - should not see how we open and close the door. We take this into account when entering the room. There is a picture to the left of the table. When the guard from the table goes to the door, we quickly cut out the valuable trophy "Compassion, disgust" (2/2) and quickly hide behind the rack. After making a circle, the guard will return to the table. Now we immediately go to the doors at the other end of the room and open the lock of the one on the left. We go outside and close the door behind us. We release a rope arrow into the beam and, using two ropes, we jump onto the upper platform. Jumping from platform to platform, we move to the control point. An alternative route is possible through the lower deck. We go down and get to the blocked door (to the left of the end point of the route of the only guard). We cut the rope of the wall panel on the wall on the right side and get to the checkpoint.

Aldus (Orion).
Primal finally took over the body and soul of Erin. After killing Orion, the girl runs away from us. We leave for the middle deck, slowly approach Erin exclusively from the back and interact with her. After several successful attempts, avoiding clashes with geeks, we return to the sanctuary and once again try to extract Primal from the girl. Primal's stone breaks, and its pieces scatter throughout the territory. Erin periodically erupts with flashes, thereby trying to inflict damage on us. In these dangerous moments, we hide behind the shadows of objects exactly on the opposite side from the girl. Two of the three shards are on the top level, the third is on the bottom. Having collected them all, we save Erin from suffering.
The situation of the fateful night is repeated when the couple tried to steal the Primal Stone: Erin is about to fall down, and Garrett is trying his best to prevent this. Unable to hold the girl, he desperately throws her claw. One can only guess about further events. With the dawn, yes, something clears up. Wet footprints and a parting gift in the form of a claw leave hope for the best...
Name: Thief
Platform: PS4, PS3, XONE, X360, PC
Genre: Action/Stealth
Developer: Eidos Montreal
Publisher: Eidos Interactive
Localization: Russian version
Release date: February 28, 2014
Garret, the master thief, emerges from the shadows into the City. In this dangerous place, where the Baron's guards spread a wave of fear and oppression, he can only rely on his own skills. Even the most cautious citizens (and their carefully guarded property) are not immune from his visit. An uprising is approaching, and Garrett is caught up in the growing uprising. Under the leadership of Orion, who speaks on behalf of the people, the oppressed citizens are ready to do anything to throw off the yoke of the Baron. Revolution is inevitable. If Garrett stays away, the streets will be covered in blood and the inhabitants will tear each other apart.
* You are Garret, the master thief. Step into the silent shoes of Garrett, a grim lone thief with unparalleled skills. Incredible robberies, impossible thefts, unimaginable secrets: he can do anything.
* The city is given to you for plunder. Explore this unhealthy, tormented city, its dark alleys and high rooftops. Sneak into the homes of the rich, into heavily guarded estates, sneak into dark corners as an uninvited and invisible guest.
* Choose your approach. Use Garrett's arsenal. Stun guards with your baton, choose the right types of arrows, and use Garrett's newfound focus to manipulate the environment and deceive enemies. What will your master thief be like?
* Unparalleled immersion. Become a part of this world with innovative graphics and naturalistic, almost tactile first-person gameplay. Thief's next-gen graphics, sound and artificial intelligence technologies will convince you of the reality of what is happening.
Prologue: Fall
On the eve of the summer festival, professional thief Garrett receives a tip on a big booty from his informant Basso. The task is complicated by the fact that he does not have to work alone. Garrett, accustomed to act quickly and quietly, will be paired with a daring and uncompromising young girl named Erin. Before the main business, Garrett did not miss the opportunity to look at the townspeople and rob his modest dwelling. We collect everything that lies in plain sight and everything that is hidden from view on the shelves behind the cabinet doors and inside the drawers. Having finished, we get out through the open window and move along the beam to the building opposite. We open the window, quickly and often pressing one button, and penetrate into the attic. Crouching or slow step in a standing position, we pass by the cages with birds. Feathers are especially sensitive to jerks, so using them will instantly arouse the suspicion of nearby enemies. We interact with the picture and slowly run our hand under the frame on each side until we find a secret switch, which will be notified by a filled icon. We activate the switch and proceed to cracking the safe. By rotating the master key, we find the correct position for it and by pressing the corresponding button we fix the lock pin. The complexity of the lock is determined by the number of pins (maximum 5). And, therefore, the more pins, the smaller the fixation radius for each of them. Having completed the break-in, we take a shiny necklace from the safe and hear someone rushing along the roof.
We go outside, turn right and go around the corner. We take out the rope arrow from the box. We look up, open the equipment menu and select the only available type of arrows. We pull the bowstring and shoot at the beam wrapped with rope. Grab the rope and climb up. Erin turned out to be the disturber of the birds' peace. She offers to check which of us runs faster. We quickly rush after our partner, overcoming simple obstacles. A well-deserved victory goes to the lady.
The stone of light, located in the lower left corner, shows whether the shadow is hiding us or not. Light circle - we are easy to see, dark - we are almost invisible. Continuing to follow Erin, we cling to the corner of the building and, not being afraid of being discovered, we safely look out from behind it by pressing the appropriate button. After advancing behind the guards, Erin will use her own development - a claw that allows her to cling to bars and climb walls with ease. We'll have to act the old fashioned way. Use an instant dash to jump through the illuminated area. Then turn left and go up the stairs. After the conversation, crouching, we pass under the pipe. We move to the control point, break the winch and climb the stairs. Having penetrated inside through the window, we break open the door lock, go into the room and take the document “Viewer's Diary” (1/1) from the table. We leave through the window and go to the next building. With a slow step we pass to the stairs, so as not to scare the bird, and climb to the next floor.
The Primal Stone is located in the ceremonial hall of Baron Northcrest's mansion. Having made our way into enemy territory, follow Erin and use the dash to instantly overcome the illuminated path. We climb a little higher, we approach the guard from the back and rob him. We jump over the fence, crouching very slowly we pass through the water and make a dash through the illuminated area. We take out a water arrow from the box and hit the torch with it. We pass through the water, climb the stairs and watch how Erin kills a young and inexperienced guard. We stun the second guard and after talking with our partner, break open the door lock.
We pick up the bottle, hide around the corner in front of the illuminated area on the right side and throw the bottle in the place where we came from. The guard will be distracted, and we will be able to freely reach the boxes to the right of the gate. We climb up, move to the scaffolding and climb the rope. Below, behind the back of a motionless guard, are a locker, which is not only an excellent cover, but also serves as an autosave point, and a box with a water arrow. Also on the other side we find a chest with valuable items. Erin kills another guard and Garrett decides to temper her ardor by stealing a claw. The Baron, Aldus and Cornelius perform a ritual using the Primal Stone to summon the Primal. Garrett offers to leave this place, and Erin insists on continuing the task. As a result, Erin, trying to return her claw, breaks down and finds herself right in the center of the ritual. Trying to save her, Garret also rushes down.
Chapter 1: Blockade
Exactly one year has passed since the last events. The city was engulfed by a disease called "Darkness", which has already killed many people. The power of the Baron is increasing every day. The guards began to look like watchdogs, ready to tear anyone for criticizing the authorities and petty offenses. Having miraculously avoided meeting with them, we hide in the alley.
Valuable trophy "Ring with amethysts".
Each chapter has unique tasks, the completion of which promises a monetary reward. The Phantom style implies the complete or partial exclusion of other styles. Stunning and killing enemies are the Predator style, while extinguishing candles or torches, suspicions and detections are the Opportunist style. The chapter is considered completed in the style for which the most actions were performed.
Concentration allows you to slow down time and highlight all active points. The stock of concentration is limited by the scale, but you can highlight active points without it. We pass forward to the end, turn left and pick up the newspaper "On Curfew" (1/19), lying near the door. Having turned around, we run forward, jump over the fence and use the claw to climb the wall. We pick up a bag of food that restores health, and climb even higher.
In the distance, you can see the clock tower - Garrett's hideout. We jump down and sit out in the shadows. One of the guards has a document "Blockade Rules" (1/2) - we rob it. If we didn’t have time to do this right away, then we wait until the guard returns to the gate alone. We move to the alley on the other side and, turning left, we pass to the end. We jump over the wall and again find ourselves on the street. In jerks we get to the lamppost after the guards disperse. We quickly pick up the trophy "Amethyst Ring" (1/4), lying near the barrel on the left side and go back to the alley. We cling to the bars with a claw, climb the wall and jump down from the other side.
We break open the door lock, squeeze between the boxes and get out into the yard of the Stonemarket masons. We jump down from the right side and we pass into the backyard. There we will find a ladder - we go down to the basement. We get to a small room, select from the pallet the newspaper “The clock on the tower has risen again!” (2/19) and make our way through the tunnel behind the shelves.
There are three ways to enter the shop. There is a craftsman in the basement who is constantly moving from one table to another. On the left table is the document "Ligruve's Letter" (2/2) - we pick it up. In it, before the beginning of each paragraph, the numbers 7, 3, 9 are indicated, which are the code for the safe. The safe itself is hidden behind a painting in the corner next to a shelving unit. The site is lit, so we act quickly, but do not get carried away. It is easy to understand from the subtitles when the master moves to another table. We find the switch under the frame, activate it, set the necessary numbers in the combination lock and pick up the valuable trophy “Mask with Lightgrove Jewels” (2/4).
We rise to the first floor and go into a small room with a sleeping guard. We slowly go to the wall safe, break open a rather complicated lock and take the valuable Blackened Bracelet trophy (3/4). There should be no mistakes, otherwise the guard will wake up. Before this, it is best to save in the closet or through the main menu. It is not worth saving if the safe door is open, because after loading this save, the guard will miraculously wake up and find a burglary (hacked doors, safes and chests left open will alert enemies). We pass into the exhibition room, wait for the guard and follow him to the left side. When the guard starts to go back, we break open the showcase in the middle and pick up the valuable trophy "Mask with Jewels" (4/4). We go up to the second floor, go into the bedroom on the right side and pick up the newspaper “Who is watching the watchdogs?” from the bed. (3/19). Slowly and without jerks we get to the open window at the other end of the corridor and get out.
We select the newspaper "Blokada!" (4/19) lying on the bench on the right side. We open the window, penetrate the building and go outside through the door at the other end of the room. We use the jerk to slip past the guards. Moving forward, we will soon come across another couple of guards. We follow them to the corner, and then cling to the grate on the pipe on the left side with a claw and, climbing up, we get to the control point.
Clock tower
On the left on the table is the newspaper "Necklace" Star of Aldale "(5/19) - we pick it up. You can store unnecessary supplies in the chest. We climb the stairs and receive a message from Basso, delivered by the crow Jeniver.
stonemarket
We leave the tower and go to the Lame Burrik tavern, avoiding clashes with the guards. Things are not good for Basso, but he will always find work for us. The recently deceased Cornelius Graves always wore a ring on his finger. This ring is of interest not only to Basso, but also to the people of the Baron, who have taken control of the old factory where the corpses are delivered.
Returning back to Basso's shop, we pick up the newspaper "Treason!" (6/19). Opposite the entrance to the tavern is a merchant. First of all, we get a wrench from him. Rope arrows will not be superfluous. You can earn money by selling unnecessary supplies, searching for useful items in the city, or completing orders from Basso and other characters. We go into the tavern and from the counter we select the newspaper "Northcrest is indestructible" (7/19).
We get to the cemetery and meet with the Queen of Beggars. A representative of the lower stratum of the population makes it clear with hints that a dangerous force lurks in the city. Having received a point of concentration, we acquire an improvement for the skill "Intuition". For each donation to the Queen of the Beggars, we get one point of concentration. Each subsequent tip will be 150 coins more expensive than the previous one. We pick up the newspaper "Old Gods in the New City?" (8/19), lying on the table near the old woman.
Chapter 2: Ashes to Ashes
The main gate of the foundry is heavily guarded. We go down the rope and jump even lower. If we go all the way to the right, we will find a short path. A wrench is required to remove the bolts from the gratings. Long way - on the territory in front of the gate. Climb up the ladder to the left of the bridge and dash between the shadows to reach the door to the right of the gate. One of the guards will fall into a dream, and the other will walk in a circle.
We jump over the wall and run to the factory building. For a second, the image of Erin appears before my eyes. We climb onto the structure located on the left side, and from it we jump to the roof of the building. We pass to the end to the right, go down the stairs and take out the valuable trophy "In memory of mercy" (1/5) from the table drawer. From the table we take away the document "Coal Mine" (1/9). We get out of the building and grab the pipe adjacent to the factory building. We go up, move to the left along the ledges and penetrate the ventilation system.
Path to the roof.
We pass through the ventilation and jump to the stairwell when the guard leaves. We get down to the end down, open the door and move to the illuminated door on the other side. The guards will disperse very soon. One of them will remain in the illuminated area, so we take the document "Transportation of cadavers" (2/9) from the wall to the right of the door only when the guard is on the left side. On the right is a short path to the hook through the ventilation. In the absence of a wrench, we climb onto the box in front of the door and climb to the top floor when the guard is on the right side. We pass to the end to the right and pick up the Broken Glass document (3/9) from the wall. Jumping down, stand at the edge and cling to the hook.
Having moved to the production workshop, we jump down before we are in the field of view of the guard. We go all the way forward, select the document “Free Place” (4/9) from the table and break open the door on the left side. We slowly pass through the glass between the cabinets, pick up the document “Repair Notification” (5/9) from the table and go out into the corridor. Following the guard, we go down the stairs and immediately look up. We shoot at the beam with a rope arrow, climb onto the cabinet and, grabbing the rope, climb up. We jump to the last bridge and pick up the valuable trophy "Brooch: Daisy" (2/5). We continue to move along the corridor until we reach a small room, from where we pass further by the guard (s) and go up the stairs. We jump over the railing and make our way through the ventilation system into the workshop. On a stack of books a little further from the door is the document "Mysterious Letter" (6/9) - we select it. To the left of the shelving is a wall safe. We set the combination 314 and pick up the valuable trophy "The Soul of a Mechanical Man" (3/5). We leave the workshop through the ventilation shaft on the right side.
We return to the stairs and get out into the corridor. Avoiding a collision with the guard, we get to the blocked door and pick up the document "Forbidden Zone" (7/9). In front of the sleeping guard is a chest lined with broken glass on all sides. We slowly pass through a noisy area or simply jump over the railing. We break open the chest, take out the key to the engine room from it and do not forget to close the lid. We pass into the next room, climb the wall with the help of a claw and wait in a dark area for a good moment to pick up the document "List of corpses" (8/9) from the pathologist's table. We return to the locked door, open it with the key and, climbing up, grab the hook.
Once in the next part of the plant, we jump down and follow forward. We watch how the General "Thieves Catcher" removes the ring from the body of Cornelisus. We pass further and get out upstairs. We pick up the document "Search Instructions" (9/9) from the wall column. We go into the room behind us, where under the grate above the conveyor belt lies a valuable trophy "Ring with diamonds" (4/5) - we pick it up. Returning back, with jerks from the countertop to the countertop we move to the other side. We make a jerk at the moment when the furnace door of the furnace closes. Next, we climb the wall on the right side and through the ventilation we get to the office of the foreman. Hack the wall safe by placing the elements according to the image. We pick up the valuable trophy "Ring of Cornelius" (5/5). We neutralize the unexpectedly appeared General and block the door.
Solved puzzle.
Break open the door and go outside. When the guards agree and disperse to their places, we move to the right side along the dark area between them. Continuing to move along the right side, carefully approach the gate and climb it with the claw. We rise along the pipe, move to the right and get out. We go to the right, jump to the roof of the building and fall down. We hide behind the rack and wait until the guard checks what happened here. Then we follow him and quickly climb onto the structure on the right side when the guards leave. We jump from surface to surface, from beam to beam and thus get to the building. We penetrate inside through the window and crouching we pass into the next room.
Stowmarket
The merchant has new tools - a razor and wire cutters - we get them. Meet Basso in Black Lane. He will introduce us to the ring's customer, Orion, who opposes the Baron's regime. We agree to get a unique book for him, located in the House of Flowers brothel. The House of Flowers is a rather secret place and not everyone is allowed to go there. Erin used to work in a brothel and naturally knew how to get there.