This beautiful sport is available not only to Olympic champions, but also to the general public. Classes on the court develop muscles and contribute to the formation of a beautiful posture. But since you have to deal with sharp blades on ice, a beginner needs to know the basic rules of skating, as well as follow safety precautions.
The learning process is influenced not only by the level of initial training, but also by equipment. You need to choose high-quality shoes of the right size, and also be able to lace them up. Read about these important preparations before going to the rink and how an adult can quickly and independently learn to skate in our article.
We train at home
Do not look at the graceful skaters on TV, start preparing yourself for one of the most popular winter fun in advance. If you have already purchased the basic equipment, then you can put it on and walk around the apartment in it. So you get used to this feeling, height and dimensions. Remember to put the plastic protection on the metal part first so as not to damage the floor.
In addition to this procedure, there are a number of preparatory exercises that will help you feel more confident on the ice. This is useful as the main problem for beginners is fear of the court, falling and other campers who move very fast. Your first visit to the rink should be accompanied by an experienced instructor. You can make it easier for your coach by doing the following exercises:
"Martin". Take a stable position, then tilt the body forward, and take one leg back so that it and the body form one line. Freeze in static for 40 seconds. Repeat 2-3 sets on both limbs. This action is aimed at developing balance, and also this posture coincides with the one that occurs when sliding.
"Stool". Press your back against the wall and slowly lower yourself as if you were sitting on a stool. Maintain a straight posture and 90-degree knees. So you train the hamstring muscle, which actively works when pushing off the ice.
"Pistol". If you are a beginner, then do sets with support. Squat as much as possible on one leg, and pull the other forward to parallel with the floor. Repeat 20 times 3 times. This technique improves coordination and strength.
Rubber band exercise. This workout is dynamic and will require a lot of effort from you. Put on a tight sports elastic band at the level of the lower leg, crouching slightly, bring one limb forward and transfer body weight to it. This will allow you to get used to the "running" movements.
Chair exercise. Place an impromptu projectile in front of you, lean on it with both hands. Squat down and alternately make jerky movements. You can use the inventory from the previous lesson. This training will teach you how to move on the ice.
Training for a beginner should be no more than 15 minutes. Before it, be sure to do a joint warm-up, and also slightly warm up the muscles.
How to dress for the rink

If this is your first time on the court, it shouldn't be too long. Experienced trainers advise to spend in class from half an hour to 40 minutes. This rule is associated with high loads on the vestibular apparatus and on the body as a whole. Also, understand that falls are inevitable, but don't be afraid of them.
Riding and learning will improve with the right equipment. Basic clothing requirements for young athletes:
does not restrict movement (elastic);
has steam and moisture insulation;
does not get wet;
does not have many fastened elements (they can injure when moving quickly).
Skating lessons for beginners become much more enjoyable if a person is comfortable and cozy in their outfit. Unlike skiing, it should be light, but just as windproof. The Stayer company makes equipment from a thin membrane cloth. A person does not feel it on himself, because it is light and soft. In addition, the windbreakers of this company have a memory effect. They remember the natural curves of the body, so the vacationer can actively train.
For the first time, you will need to dress warmly, as you will not move as dynamically as later. You must have:
soft trousers or leggings (no jeans);
T-shirt;
olympic;
windbreaker;
hat or headband;
gloves;
fabric knee pads;
woolen ankle pads (optional).
Do not neglect even the smallest details of a tracksuit, as they all perform a certain function. Gloves will save you not only from the cold, but also from abrasions.
How to put on skates

To achieve maximum comfort and avoid injury, you need to wear the right shoes. Get the right shoes for you, taking into account individual parameters, such as:
-
rigidity.
riding style;
There are several types of equipment:
curly;
hockey;
skating.
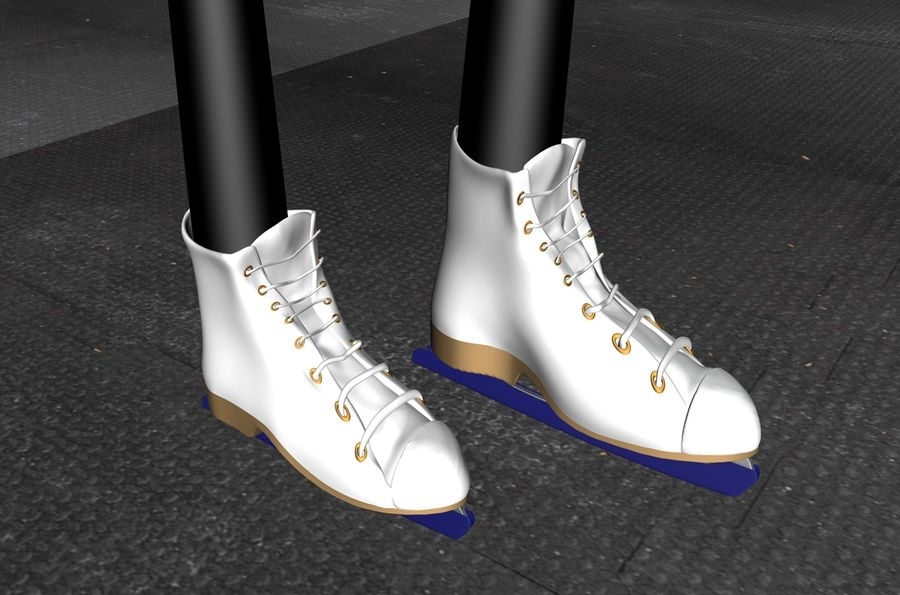
In these cases, it has a different shape and degree of rigidity. For future hockey players, they make the most durable boots with plastic inserts. But for beginners who just want to spend their leisure time on the rink, curly or skating options are suitable. Choose shoes 0.5 - 1.5 sizes larger to fit a woolen sock.
You need to put on equipment while sitting to fix the leg in a natural position - the foot is parallel to the floor. The boot has special hooks on both sides of the "tongue". Attach the laces to them, crossing them in the middle. Tighten firmly, but do not pinch the vessels. Otherwise, the limbs will swell, and the learning process itself will become unpleasant.
Exit to the ice
After the preparatory activities, you can learn on the court how to learn how to skate well. Choose a weekday when it will not be so crowded. It is better for the first attempts to go to an indoor skating rink, where there is no snow cover on the ice. Artificial turf is smoother, without pits and chips. Ice arenas usually have rubberized sides that you can hold on to or brake in. For successful skiing, you need to master the basic elements.
The video will help you learn the basics:
Slip
To start moving, you must bend your knees to 30 to 45 degrees. Do not train on straight legs! This is wrong and traumatic. Don't try to walk or run, the blade is designed to glide:
Push off with your right limb, lifting it slightly off the surface. Shift your weight to the left. Maintain balance while the movement lasts.
Take the right forward, change the center of gravity. Now the other leg will be the push leg.
Alternate pushes gradually, increasing the length of the slide on one of them.
Under the toe on the blade there are spikes, they help to brake and turn. But if you don't lift your foot high enough off the ice, you might trip. To prevent this from happening, it is not necessary to ride with a “swallow”, like skaters, it is enough to point the toe not straight down, but slightly to the side when repulsing.
Look at the correct sliding technique from the master of sports in figure skating.
Braking
If you stop at the "side" all the time, sooner or later you will break even the most durable equipment. In order not to injure yourself or others and keep your athletic shoes in good condition, learn to interrupt the movement. Here are some exercises to help you:
Ice thrust. In this technique, the edge of the skate is either external or internal. When you stop, you turn the foot, respectively, toe out or in. One blade tends perpendicular to the other, but they do not touch. You press hard on the surface, slightly in front of you.
Plow. This technique comes from skiing. Bring your knees and toes together and sit down.
Braking is an integral part of the entire riding process. It is important to learn how to do it quickly and correctly.
Turn
When you already feel more confident on the ice, learn to lay turns. First, try the easiest option: start moving in a small arc, each time slightly changing the position of the foot. This option is the safest for beginners, but also leads in terms of low execution speed.
Therefore, there is an alternative for advanced ones: change legs from cross to cross, with an emphasis on the left. Place one limb exactly in front of the other. So you shorten the arc.
Learn to turn from the video:
Riding in reverse
How to learn to skate with your back? This technique looks very nice and professional, and also gives a lot of fun. But there are some difficulties - you need to constantly look over your shoulder. In addition, it is better to start mastering this element no earlier than the fifth lesson. However, the execution technique is not so complicated:
Make sure there is no one behind you, and try to push off from a stable support - a ledge or a bench.
Squat down and transfer your body weight from one side to the other, making undulating movements.
Complicate the element - push off on your own. Bring your working leg forward, then return it to its place and change.
A sure sign that you have mastered skiing with your back is your footprints. They should be two wavy lines.
Watch the video and learn how to ride backwards:
The fall
Even experienced runners and fans of this sport are not immune from such a curiosity. Therefore, it is necessary to learn how to land correctly. Put on protection before going out: knee pads and elbow pads.
Group up. Grasp the back of your head with your hands, press your chin to your chest, and your knees to your stomach.
Do not lie on the ice for a long time, it threatens with hypothermia.
After falling, clench your hands into fists, and pull your legs towards you.
You should also rise correctly and quickly:
Roll over from your back to your stomach.
Get on all fours.
Bend one limb at the knee and lean on it.
Get up on both feet at once.
The video will help to master the correct fall:
You can get a good result after the first 2-3 sessions. The main thing is to observe safety precautions and not to rush. Be persistent, and success will not be long in coming.
Skating is an amazing sport. And beautiful, and poetic, and healthy. Over the centuries-old history of skates, many kind words have been written about them, many literary works and wonderful paintings have been created.
Here is what people's artist Mikhail Zharov said:
“At first I had a different passion: as a boy I stood at the gates of the Moscow Union team, but, having conceded 13 goals, I was “exposed” from football and put on skates. Since then, I have fallen in love with them, sincerely I rejoice when the time comes for skating rinks and peas of multi-colored hats crumble on the slippery surface of the ice.
The years have passed, he has become completely gray-haired, but the first love is not forgotten. After all, you can’t change youth, you can’t stop loving it. To tell the truth, over the years I began to wait even more strongly for the arrival of winter: a pair of skates became an everlasting youth for me.
Life didn't make me a champion, but I don't get mad at her for it. Ultimately, I took the main thing from sports - strength and health. I know people understand sports differently. For some, he is youth, for others - almost a hindrance. And often the latter say: busy, it’s too late to start ... But if you break a glass, you won’t get drunk from it; if you spill your health on the roads of life, like water, you will not collect it later. For example, I have yet to meet a blacksmith who, citing being busy, would not temper the blade, would not shoe the horse in time. Are we not the smiths of our joy and our common great Happiness and Health! Yes, we will become bad blacksmiths if we do not temper ourselves in sports.
And for me, sport has been and remains the best, most reliable guarantee of health. And first of all it concerns skates. I have never regretted the hours spent at the rink. Now, when so many decades have already passed, skating for me is a date with youth, but before it was a part of life lived at a fast pace.
Skating is a sport where a beginner gets no less pleasure than an experienced master.
After all, the air is the same for everyone, very fresh, very snowy. As for speed, it is still always lacking, whether you are a master of sports, even my housemate on Kotelnicheskaya embankment - Oleg Goncharenko, a champion of champions ...
Turning to all the people I know and strangers, to my friends and friends of friends, I say: do not forget, brothers, that there are good things on earth: frost, sun and fast and fast skates ... ".
Skating the muscles of the legs, back, abdomen, joints, ligaments, brings up a sense of balance, coordination of movements.
Many would-be sports stars started out on skates just because their parents thought it was a great fit. So, the "ice fairy" - ten-time world champion in figure skating, three-time Olympic champion Norwegian - Sonya Henn went on the ice when she was not yet four years old. Her father, world cycling champion Wilhelm Henn, taught the girl to cross-country skates. And only two years later, noticing athletic abilities in the child, Wilhelm took the baby to a figure skating school.
Yes, all champions started from the very day when, “shoeing their sharp feet with iron”, they went out onto the ice to take the first step.
When you watch how our best masters run across the ice, it takes your breath away from admiration, from the consciousness that we are becoming witnesses of genuine art.
And, probably, every beginner wants to learn how to ride as beautifully and quickly as they do.
It is not easy to do this, but you can and should try. The content of this material is a copybook, a primer, a self-instruction manual for a novice athlete.
Before going on the ice, let's carefully study the advice of the doctor of medical sciences, professor, head of the hygiene department of the Central Institute of Physical Culture Alexander Laptev:
- At the rink, first of all, you need to beware of frostbite. The first signs are blanching of the skin, tingling, a feeling of numbness. Noticing this, vigorously rub the affected area with your hand, woolen mitten, scarf. You can not rub the skin with snow, because small pieces of ice can hurt it and cause an infection. Remember well: you can get frostbite even with a relatively slight frost. Companions of frostbite - wind, tight and wet shoes, clothes that do not match the weather.
You can not relax outdoors - only indoors. If it's warm there, take off your jacket and hat, unbutton the collar, unlace your shoes. Be sure to change after class. Dry clothes protect against colds. When you get home, take a warm shower.
Hygiene rules, apparently, are simple. But it is necessary to adhere to them in order for skating to become a holiday and joy.
The Olympic champion Lyudmila Titova starts a conversation about the secrets of the "ice kitchen".
How to choose skates?
There are no skates that would be suitable for all types of speed skating. Some are needed for speed running, others for figure skating, others for hockey, and fourth for simple skating.
Skates are divided into simple and cross-country. Skates of the "Snow Maiden", "Nurmis", "English Sport" and hockey systems are called simple.
Athletes call cross-country skates "begash" and "Norwegian". Their blades are thinner and longer than those of ordinary ones. They have less stability for beginners, but you can run faster on such skates.
You can learn to skate on any skate.
But in early childhood, it is best to start on the "Snow Maiden" or hockey. The first steps on the ice, the development of stability and balance, the skills of proper gliding, familiarity with the basics of skating technique, even participation in the first competitions - most of the well-known Soviet runners traveled all this way on simple skates. They are easier to master the technique of running.
The second question is the skater's shoes. It is advisable to buy skate boots a size larger than the shoe size that you wear in everyday life.
I know that among some parents who want to teach their kids how to skate, there is an opinion that skate boots should be much larger than normal shoes. What do those who advocate extra numbers come from? They believe: you need to wear several pairs of socks so as not to freeze your feet. You really need to wear warm socks, but one pair. If you wear two pairs of socks or large boots that hang loose on your feet, you will not be able to feel the ice and you will have difficulty controlling the blades of your skates. And then the child will have a feeling of insecurity.
Skating is only fun if the blades are sharp.
Sharpen your skates! The commandment is one of the first. They sharpen skates there so that there are no burrs - on all four ribs. The whetstones are lubricated with engine oil or a mixture of oil and kerosene.
To keep skate blades from becoming dull(when leaving the locker room to the rink) and mechanical damage, it is necessary to wear covers. If you can't buy them in the store, then the covers can be sewn from thick leather or made from a bicycle tube.
Well, if at first you don’t have a point machine, then fix the skate perpendicular to the table or workbench. With a carborundum bar, leading it parallel to the table, remove the top layer. Then test the blade with your fingernail to see if there are any burrs. When you are sure that all the edges of the blades are sharp, take a narrow block and remove the burrs. Run your index finger along the edges of the blades. If the pad of your finger does not encounter any obstacle, then you have sharpened the skates correctly. If you feel roughness at least at one point, continue to remove the burrs with a small bar.
How to lace up boots?
Often I had to see guys who tightened the laces of their shoes so much that it was difficult to even move their fingers. Moreover, I don’t know, however, for what purpose, but some beginners in the most unthinkable directions “bandage” their shoes.
Shoes must be laced in a cross-shaped overlap. The laces should not be thick; ordinary linen braid is quite suitable. Insert its end into the holes of the boot from above, and then when tightened, the lacing will not unravel. The lower part of the boot should not be tightened strongly, but be sure to tighten the middle part more tightly, and lace up the upper part freely so that when you lean forward, the braid does not interfere with movement.
Speed running is not hockey: the leg needs freedom. I would not advise tightening the laces so that the toes cannot move. When the legs are tightened, they get tired faster. And they freeze!
How to dress for the rink?
It is best to wear a woolen leotard (breeches) and a sweater when going on the ice. If the child does not have such a suit, let him put on an ordinary training or ski suit. And it would also be useful to wear a tarpaulin or bologna jacket over the sweater - this will protect you from the wind.
The skater's clothing should be light, comfortable, tight-fitting, so that there is less air resistance when running. Warm knitted underwear is usually worn under the suit.
On the feet - woolen socks, and if it is very cold, then the toes are wrapped in paper, on it - another pair of socks (it can be elastic with wool). Put a hat on your head; it should cover not only the hair, but also the ears, which are very sensitive to frost.
There are boys who believe that the lighter they dress for training, the bolder they are, they are not afraid of the frost itself. But no one needs such courage.
The best athletes in the world always train in warm clothes.
Finally, you got dressed, put on shoes ... On the ice, a beginner skater feels uncomfortable on skates: they move apart, the body sways, their legs do not hold. In order to quickly learn how to move on the ice, we advise you to practice at home even before going to the rink. Stomp on the floor a little, putting covers on the blades so that the skates do not dull and the floor is not spoiled. Or lay down an old rug. Walking around the room, you will feel stability. When you master the technique of balance on an unusually reduced support for you, move on to more complex exercises. Holding on to the back of a chair, try doing half squats. Then gradually complicate the movements. Squat with your leg forward.
These exercises in the room should be done for 8 - 10 minutes a day.
When you put on skates and walk on the floor, try to bend the skates with the runners outward to strengthen the ligaments in your feet.
Beginning athletes will learn the secrets of skating technique not only from training on ice, but also from classes that can be done at home.
Of course, each of those who dream of learning to skate asked himself: “Why do some people skate well, quickly and beautifully, while others clumsily and slowly?” A bad skater has legs like wood, his knees do not bend, his body is straightened, his hands helplessly look for their place while skating.
A skilled athlete smoothly lowers onto one leg, bending the leg at the knee, then, straightening, switches to the other leg and tilts the body to the same side. It is not difficult to understand that in order to skate well, you need to be able to mainly use the weight of the body correctly. The skater, dropping onto his right leg and bending it at the knee, leaning in the same direction, squats somewhat. The weight of the body gives impetus to the skate. The same thing happens when transferring weight to the left leg.
So, in order to learn how to ride correctly, you need to be able to transfer the weight of the body from one leg to another, and bend your legs in time. This is exactly what you can learn before you go out on the ice. Try these simulation exercises.
1. Starting position (ip) - hands behind the back tightly pressed to the body, feet and knees together. Bending your knees, tilt your torso (up to about 45' to the area of support). Do a few squats. Try to find a comfortable position for yourself by changing the landing height.
2. I. p. - the same as in the previous exercise. Alternately take your legs (for the length of a step) to the sides and back, slightly bending them at the knee, put them on the toe, heel up.
To these exercises, add walking on toes, heels, outer arches of the feet, lunges with the right and left sides, "goose" and cross steps, with hand swings ...
The value of these simulation exercises is that they are similar in nature to skating and, therefore, develop the necessary skills, precise coordination.
A little bit got acquainted with the elementary truths - now you can go on the ice!
If possible, then ride on a sparsely populated ice rink. The first steps are best taken where there is not much movement. When going out on the ice, watch your feet: socks should be turned outward. This will provide stability. Take a few steps, then try to slide on the blades set in parallel. After mastering this exercise, slide on one leg. You can even hold a competition among beginners - who will go further in this way.
When it is cold outside, breathing through the mouth can cause a sharp hypothermia of the lungs and larynx. My advice is to breathe not only through your mouth, but also through your nose. Cold air, passing through the nasal cavity, heats up and becomes harmless to the throat and lungs.
Tilt your body forward while riding. If you, leaning forward, suddenly fall (and to be honest - you attack a lot during ice openings!), you do not risk hitting the back of your head on the ice. Don't be discouraged by such failures. Everyone started with falls.
Skater landing. Mastering the landing means learning to ride on bent legs.
Speaking of landing, once again I pay attention to the tilt of the body, which helps to make pushes deeper and stronger. In addition, the fit gives the body a streamlined posture.
When running, the head of the runner is slightly raised, the gaze is directed 10-15 meters ahead.
Running in a straight line.
One of the mistakes that a beginner makes is to try to run on the ice instead of sliding. The coach of the three-time world champion Maria Isakova, Ivan Anikanov, advised: “Get accustomed to taking even steps of the same length. Use every step to the end. Make each next push light and smooth, without losing speed. When pushing, do not forget to simultaneously transfer the weight of the body to the sliding leg.
Smoothness and uniformity of movement, lack of jerks - this is the basis of a good rolling step. When running in a straight line, you need to learn to glide evenly on both feet so that the movements are performed with equal ease with both the left and right foot. Care must be taken to ensure that the legs do not tuck and the skates slide on the ice, and not the welts of the boots.
To develop a long sliding step, I recommend this exercise: on each leg you need to roll 8 - 10 meters. The right leg after the push comes off the ice, bends at the knee and describes a “loop” above the ice. Then it is sent forward, placed a little ahead of the left skate, on which the skater glides. At that moment, when the right skate has landed on the ice, the left one goes to the side and is placed on the edge to prepare the push. All this happens in an elusive fraction of a second. During the run, all movements are repeated a thousand times. They should be as smooth as possible. To check if the push is performed correctly, look at your footprints - they usually look like branches of a Christmas tree. If the “herringbone” is very wide, then you are throwing the skates too far to the sides when pushing. Correct the mistake - the "herringbone" will become narrower.
How to make turns?
On the rink, where scores of skaters who do not always strictly adhere to the established rules fly by headlong, a beginner who does not know how to turn sharply exposes himself to some risk: if he himself does not fall, others will knock him down. Therefore, from the very first days of skating, you need to learn how to make turns correctly, or, as they usually say, ride “through the leg”.
In all competitions, skaters run counterclockwise. All turns are made to the left, and therefore the main work on the turn falls on the left leg - the whole body rests on it, like on an axis.
Tilt your body slightly to the left, shift your weight onto your left foot and place it on the outside of the blade. After that, do what skaters call a run: cross your right foot over your left. Then lift your left leg and, crossing your right leg behind it, gently place it on the ice in front of your right.
Don't jump around corners. Tilt your body in the direction of rotation, that is, to the left. The legs should be slightly bent at all times. Note that you slide more on both feet when turning than when running in a straight line.
It is somewhat more difficult to ride through the leg in the direction opposite to the usual movement in a circle. The principle of rotation in this case is not much different in technique from that described above.
Keep an eye on the movement of your shoulders when turning. They should be parallel to the ice as they move. How to brake on ice? To be able to slow down is also an art. It acquires special significance during mass skating, when you need to instantly interrupt the run, stop so as not to collide with someone, not to run into the fallen.
Braking.
The easiest way to stop is to use the inner edge of the ridge of the forward leg on the ice. Another option is to bring your knees and toes together, push the heels of your skates out to the sides, and bend your legs. As in skiing - "plough".
The third method of braking - half-turn - is somewhat more complicated, and should be used only when you have learned to use your skates quite well. It looks like this: the athlete makes a sharp turn of 90 degrees on the move, puts the skates perpendicular to the direction of movement - one on the inside edge, the other on the outside. In this case, the body slightly deviates back.
Finally, if you're skating on bad ice and you're afraid of damaging your skates, brake with the back of your skate by putting your foot forward and lifting your toe.
How to ride back? Driving back is not as easy as it seems when we watch figure skaters and hockey matches on the TV screen. It is not enough to turn your back and try to move your legs. The secret to skating backwards is to properly use the weight of the body and the pushing of the skates on the ice. We recommend that you first learn a special way of driving forward.
Stand on the ice and spread your socks in different directions, and then try to move them, while starting to move forward. When the legs join, spread them again. When breeding the legs, the emphasis should be on the outer blades of the skate, and when reducing, on the inner ones. When you have managed to move forward in this way, you can move on to the next exercise, which will teach you to ride backwards correctly.
Instead of spreading your socks, spread your heels to the sides. Spreading your legs in different directions, focus the weight of the body on the inner ribs. The legs also bend, and the body leans forward, although not as low as when riding forward.
The method of riding backwards, or "backward forward", described below, is the most accessible. A more perfect way to ride backwards should be considered the transfer of the weight of the body from one foot to the other.
Sliding backwards.
spectacular element of skating. It is more adopted by figure skaters and hockey players than skaters. But if a skater can also run backwards, then he has mastered the secrets of skates. Coaches often have to run “backward” when, in the course of classes, they need to tell something to students rushing along the distance.
How to store skates?
When the winter is over, do not rush to throw your skates into the closet or on the mezzanine. Wipe them, grease the blades with machine oil, and the skin of the boots with petroleum jelly, carefully wrap them in paper - and hide them in a cherished place.
Skaters smoothly sliding on the ice in many of us cause admiration and a desire to perform the most difficult pirouettes on skates with the same mastery. But you can achieve perfection only when you master the basics well. Therefore, we will tell you how to learn to skate as soon as possible, and give the rules that will help you do it without injury.
Preparatory stage
Going to the skating rink without proper physical preparation means doubling the training period. Therefore, even before going to the skating rink, you need to practice balance and strengthen the ankle ligaments.
The following exercises will help you achieve results:
- squatting on one leg. Squatting on the right leg, stretch the left forward. After 5-10 reps (depending on your fitness level) switch legs. This exercise not only improves your balance, but also strengthens your leg muscles;
- abduction of the legs to the side and back. In a standing position, without holding the support with your hands, take one leg to the side, linger in this position for 5 seconds and return to the starting position. Take your leg back and hold in this position, counting to five. The number of repetitions - 10 times;

- walking on toes and heels. Such a load will strengthen the arch of the foot and ankle ligaments;
- ice skating. Wearing uncovered skates, walk around the house to learn how to balance.
Only after you feel confident skating on a non-slip surface, you can go to conquer the ice.
Safety regulations
Ice skating is one of the most traumatic sports, and the reason for this is not only unsuccessful falls, but also frostbite. There are several rules to learn how to skate with minimal risk.
The right equipment
A bulky sheepskin coat is not the best choice for going out on the ice. Of course, it will soften the fall, but it will deprive you of freedom of movement and make you sweat a lot. Therefore, choose bulky clothes that do not hinder movement, but can protect from the cold.

On the head - a hat, on the neck - a short scarf, on the hands - mittens. Mittens not only provide protection from the cold, but also soften the blow during a fall. No long coats and scarves - you risk getting confused in them. Clothing should be moderately warm and comfortable.
Skate selection
Few people buy skates for the first lesson, because most of us at that time do not know if we want to continue conquering the ice. But even at the box office there are several types of skates, among which you need to choose the appropriate option:
- curly - shoes for professional figure skaters. They can be distinguished by their heavy weight and the presence of teeth on the blades;

- hockey - an attribute of "real men" chasing the puck. Their distinguishing features are longer blades and lighter boots, which are also protected in certain places from being hit by the puck. Such skates do not have insulation, so warm socks are worn with them;

- skating - shoes for ice sprinters. They have an elongated blade that separates from the back of the skate. If the first two options can be used in teaching ice skating, then speed skating is not suitable for these purposes;

- pleasure (universal) - a compromise option, created specifically for those who want to learn how to skate. They are light and warm, although they should not be worn over a nylon stocking.

Choose skates 0.5-1 size larger than yours and lace correctly: tighter at the ankle and less tight at the toes and at the end of the lacing. This will keep the foot mobile but prevent fracture in the event of a blow or fall.
behavior on ice
Alas, no one has yet been able to learn to skate without falling. To make landings less traumatic, try to bend your legs and fall on the outside of your thigh. Immediately tighten your fingers so that the neighbors do not drive over them.

Learned to skate. Apart from a few who died of laughter, there were no casualties or injuries. From internet folklore
Do not sit or lie on the ice, get up immediately. First, kneel, then put one foot on the skate, then rest on the ice with the other and straighten it.
Skating lesson
The task of the first lesson is to learn how to slide and brake.
Slip
While sliding with two legs, the feet should be parallel to each other. Spread your socks to the side - and your limbs will part in different directions, not allowing you to maintain balance. Bring your toes in and finish your trick by landing on the ice rink.

To make it easier to maintain balance, spread your arms to the sides when sliding.
Many try to learn how to skate by moving under the side around the arena. Of course, you can walk a couple of circles in this way, but you should not abuse the walking around the bush. Until you get off the ground and "feel" the ice, you won't be able to master skating.

Having learned to keep balance with parallel sliding legs, move on to sliding with repulsion. Place your feet in the third position (feet perpendicular to each other), with the back foot placed across the line of motion. Push off with it, transferring the weight of the body to the front standing leg, and try to drive some distance.

Then do the same with the other leg. When pushing, bend your knees, tilt your body forward, but keep your back straight. Do not try to accelerate much, now the main thing is not to pick up speed, but to work out the technique.
Braking
At a low speed (and while you are learning, it is better not to ride fast), we advise you to slow down with the skate of one foot. Move it forward, perpendicular to the direction of travel, and focus on the inside of the blade. In this case, the body must also be turned sideways to the direction of braking.

By braking, you remove the top layer of ice with a blade, thereby increasing friction and as a result, you stop. Focus on the heel of the braking leg.
You won't become a professional in one lesson, but you will get the basic skills of behavior on the ice. For more tips on how to learn to skate, you will find in the video tutorial:
Take it, tell your friends!
Read also on our website:
show more
A very simple video tutorial on how to start taking the first steps if you want to learn how to skate.
How to choose skates you can.
Performing preparatory exercises.
Confidently stand on skates will help special exercises that are performed on ice.
To start learning skater stance: the legs are slightly bent at the knee joints and placed narrower than the width of the shoulders. The arms are also slightly bent at the elbows and placed to the sides for greater stability. The body leans forward a little. Keeping this position, you can walk on the ice, sit down several times, not forgetting the slight tilt of the whole body forward. This simple exercise will help improve your sense of balance. If you find it difficult to immediately get on the ice, then you should first practice on the snow.
Performing the following exercises will help you feel more confident on the ice: walking sideways with side steps, deep squats, and just skating on ice.
Basic exercises on ice
Having worked out the previous elements, you can try to execute " herringbone". The right foot is placed forward, the left - diagonally behind it, pushing off with the left foot, sliding forward is performed. Alternating legs, you continue to slide, leaving a herringbone pattern behind you.
First time exercise "flashlights" you can perform while holding the hands of a girlfriend or friend. The legs ride together, then smoothly move apart in different directions, describing the shape of a flashlight, and return to their original position.
For execution exercises "snake" legs slide together from side to side, leaving traces of parallel snakes on the ice.
It will be useful to work plow braking. To do this, the legs initially ride together, and during braking, you must rest your heels on the ice with all your strength. The speed will begin to decrease due to the cutting of the skates into the ice.
Fairly easy to perform turns. Starting position - skater's stance. Next, you need to tilt the body in the direction where you want to turn, helping yourself with the outer edge of the skate that is outside the turn.
How to fall correctly?
No one has yet mastered skating without falling. It is extremely important to work out the safest option, which will help to avoid serious injuries and injuries.
The most common causes of loss of balance and falls are riding on straight legs and pushing with teeth.
You must understand that absolutely impossible to fall back, because you can hit your head hard. If a fall is unavoidable, it is best to group as follows: quickly squat down, thereby lowering the height of the fall, press your hands to your chest, and not expose them, trying to soften the fall. The least painful fall to the side.
For a child, it is not an extra precaution to buy a special helmet, knee pads, elbow pads, which will help protect the child from injury.
Do not put on the baby an excessive amount of clothing, trying to soften the fall. Clothing should be comfortable and not restrict his movements on the ice.
Where to start learning to skate?
Learn to skate the easiest way is on a paid rink. Here they closely monitor the condition of the ice, regularly restore it, patching up the cracks and pits that appear. An obligatory attribute of such a skating rink is a side, for which it will be convenient for you to hold on so as not to fall at first. Skate rentals are organized at paid skating rinks, special coasters sliding on ice are issued for teaching children to skate without falling.
While riding on the frozen river near your house, you may come across rocks, ice growths, cracks in the ice and fishing holes. In such conditions, starting training will be difficult and dangerous to health.
