If you have had a knee injury or suffer from arthrosis of the knee joint, you may be afraid to give a painful joint a load. And this is the biggest mistake that a person with joint problems can make.
And after injuries, and with arthrosis, and with arthritis, and with other joint ailments, the knee must be given physical activity. Another thing is that it should be done correctly. Below are 12 safe exercise to strengthen, both healthy and sick, the knee joint.
This is the simplest exercise that even people with severe joint damage should perform.
- Sit on a chair. Feet are on the floor. Hands rest on the knees or lowered to the sides of the body.
- Slowly raise one leg, straightening it at the knee.
- Hold the pose for 2-3 seconds, then return to starting position.
- Repeat 10-15 times for each leg.
Hamstring tension
- Stand up straight. You can stick to a wall or a chair. However, it will be better if you do the exercise without support. This will not only give a load on the tendon, but also improve the functioning of the vestibular apparatus.
- Slowly bend one leg at the knee, moving the foot back.
- Repeat 20 times for each leg.

If you don't have any serious problems with your knees, give them some extra work. To do this, do not lift your free leg, but pull an elastic band or expander with it. 
Calf stretch
- Stand facing a wall with your palms on it.
- Take your right leg back, and put your left leg forward and bend at the knee, transferring the entire body weight to it. In this case, the knee of the right leg should remain straightened, and the feet of both legs should be pressed to the floor.
- Hold the pose for 30 seconds.
- Repeat for the second leg.

Lateral hip lift
- Lie on the floor on your left side.
- Raise your body by leaning on your left forearm. Lift your left thigh off the floor, accepting.
- It is not necessary to hold the pose for a long time. You can jump right back.
- Do 30 repetitions for each side of the body.

Lateral leg lift
- Lie on the floor on your left side.
- Raise your body by leaning on your left forearm. Raise your right leg up, trying not to bend it at the knee. Raise as high as you can.
- Do 30 repetitions for each leg.

Straight leg lift
- Lie on your back. The arms are parallel to the body and pressed to the floor with the brushes.
- Bend one leg at the knee, and lift the other up. The leg should remain straight and form an angle of 90 degrees with the body. Do not tear your lower back or arms off the floor.
- Repeat 10-12 times for each leg.

Leg raise, prone
- Lie on your stomach.
- Raise one leg up, without bending it at the knee, as high as possible.
- Hold the pose for 3-5 seconds.
- Repeat 10 times for each leg.

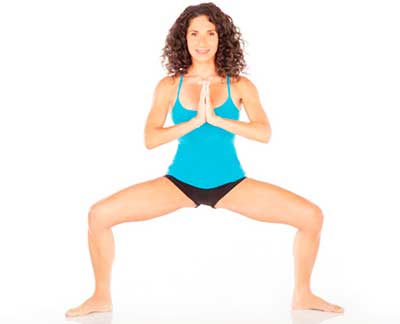
- Stand straight with your legs apart 1.2-1.4 meters.
- Place your hands in front of your chest.
- Slowly bend your knees. Ideally, your thighs should be parallel to the floor. But if this is not possible, just bend your legs to the extent that your physical fitness allows.
- Keep your back straight and your knees out to the side (you may want to bring them together, but don't give in to that urge).
- Hold the pose for 15 breaths and then slowly return to the starting position.
- Repeat 3 times.
- Stand up straight.
- Slowly sit down so that a 45-degree angle is formed (knees should not go beyond the toes).
- Fix the pose for a few seconds. In order not to fall, protect yourself from behind with a chair.
- Repeat 10-15 times.

Climbing stairs
- Stand up straight with a small bench in front of you.
- Raise your right leg on it, and then pull your left leg up.
- Return to the starting position and make a rise to the bench, starting with the left foot.
- Repeat for each leg 20 times.

To increase the load, take dumbbells.
Today we propose to discuss the topic: "circular movements of the knee joints." We tried to fully reveal the topic and present it in a convenient way. You can ask your questions after reading the article in the comments.
Starting position: legs together, torso tilted forward, hands of both hands on the knees, head raised, gaze directed forward (photo 82).
1. Bend your knees, rotate your knees clockwise (photo 83).
2. Return to the starting position (photo 84).
3. Bend your knees, rotate your knees counterclockwise (photo 85).
4. Return to the starting position (photo 86).
Perform the exercise 8 times.
The exercise develops the main joints of the legs, increases the flexibility of the ligaments of the knee joints and increases their strength.
When performing the exercise, make sure that the rotations in the knee joints are uniform and smooth, the range of motion is maximum, when the knees are laid back, the legs should be straight, the heels should not be torn off the floor.
At correct execution exercises you should feel the sense of Ki in the knee and ankle joints.
Exercise "Circular movements of the knees"
Starting position: pose high start. Become straight and straight, legs straightened, feet and knees together. Bend your back, lower your head, relax your neck and shoulders. Rest your hands on your knees.
At the expense of "one", bend your knees sharply (the knees make a sharp push-lunge forward) and take a breath. Immediately, without a pause, perform a circular motion with two knees bent to the right. Exhalation goes absolutely passively during the circular movement of the knees. At the end of this movement, straighten your knees. Then, during a short noisy inhalation with the nose, repeat a sharp lunge with the knees forward, as if to squat slightly on both legs, and again, on a passive exhalation, perform a circular movement of the knees to the right, followed by straightening them and returning to their original position. The torso is tilted all the time, as in the “Pump” exercise, the hands all the time rest on the knees.
After 16 breaths-movements, straighten, lower your arms and rest standing for 3-5 seconds, then again take a high start position and perform 16 breaths-movements with rotation of the knees to the left side with a 3-5 second rest at the end. In total, 32 breaths-movements will turn out, i.e. "thirty". The norm is 96 breaths-movements, so you need to complete 3 "thirty" ("hundred").
With a good workout, you can do 32 breaths-movements without stopping (16 rotations in each direction) and only then rest while standing for 3-5 seconds (if you are tired, rest up to 10 seconds).
Remember, a short and noisy inhalation through the nose is done only during bending-lunge of the knees forward, and exhalation during the circular movement of the knees leaves on its own through the nose or through the mouth. Inhalation is active, and exhalation is absolutely passive, you don’t need to think about it! Think only about the breath. Exhalation is the used air, "waste slag", it leaves after each breath invisibly and inaudibly. It "dissolves" with a circular movement of the knees. "Exhalation is the outgoing breath!" - Alexandra Nikolaevna Strelnikova reminded the patients.
Remember, after each circular movement, the knees must be straightened, after which they sharply bend on inspiration, as during a half-squat.
This exercise strengthens the knee joint, is indicated for arthrosis of the knee joint. The hip and ankle joints are also strengthened. It is used as a prophylactic for fractures and dislocations.
Technique:
Photo 31.
Photo 32.
The nature of the impact:
Important points:
Circular rotations with the right hand Technique: from the initial position of the leg at shoulder width, left hand straightened forward at shoulder level, perform circular movements with your right hand, first clockwise, then counterclockwise. Photo 7. Circular movements
Circular rotations with the left hand Technique: from the initial position of the leg at shoulder width, the right arm is straightened forward at shoulder level, perform circular movements with the left hand, first clockwise, then counterclockwise. Photo 8. Circular movements
Rotations of the arms in the shoulder joints Technique: from the initial position of the legs shoulder-width apart, hands on the shoulders, rotate the arms in the shoulder joints, first clockwise, then counterclockwise. Photo 9. Rotation of the arms in the shoulder joints Character
Circular movements with the body Technique: from the initial position of the legs wider than the shoulders, perform circular movements with the body, first clockwise, then counterclockwise. Photo 25. Circular movements of the torso clockwise Photo 26. Circular movements
Circular movements of the pelvis Technique: from the initial position of the legs shoulder-width apart, hands on the belt, perform circular movements of the pelvis, first clockwise, then counterclockwise. Photo 27 Circular movements of the pelvis counterclockwise Photo 28 Circular movements
Circular movements of the foot with the help of hands Technique: from the starting position, perform active movements of the hand holding the foot, circular movements of the foot, first clockwise, then counterclockwise. After doing the exercise for the right leg,
Circular movements of the foot Technique: from the initial position of the legs shoulder width apart, hands on the belt, move the body weight to left leg, put your right foot on the toe and perform circular movements with the foot, first clockwise, then counterclockwise.
3. Dried apricots, raisins, lemon, nuts, honey should be present in the diet. This vitamin mixture shows maximum benefit in diseases of the joints. In addition, compliance with a low-protein diet, which is recommended for arthrosis, arthritis, is greatly facilitated.
Of the fruits, the most useful are apples, apricots, plums. It is recommended to eat two oranges or tangerines every day, which contain a significant amount of ascorbic acid, which is necessary to eliminate the risks of pathological changes in the joints.
4. Every day you should drink two and a half liters of fluid. You can give preference to ordinary water, green tea, birch sap. Remember that lack of fluid leads to cracking of the cartilage pads, deterioration of the joints.
5. Give up black tea and alcoholic beverages, as they can increase the manifestation of unpleasant symptoms.
Now you know what nutrition will improve your health.
As is known, folk recipes medicines can be effective and help eliminate unpleasant disorders. However, how can this treatment be carried out? It should be noted that the treatment of pain in the knee joint will help to successfully carry out traditional medicine, represented by a variety of recipes.Now you know how many ways traditional medicine offers.
For the successful treatment of arthritis, arthrosis, you can use special drugs that are available, both by prescription and over the counter. Popular medications include non-aspirin pain relievers, anti-inflammatory drugs, disease modifiers, corticosteroids, and sleeping pills. Regardless of which drug will be used for treatment, you should first undergo a consultation and diagnosis with a physician.
Injections
To temporarily relieve pain, it is sometimes customary to use hyaluronic acid, which should be produced in healthy joints. In addition, the introduction of anesthetics with a corticosteroid anti-inflammatory drug is possible. However, this type of treatment is possible only after consultation with an experienced doctor.
What loads should be avoided?
Without fail, give up intensive climbing stairs, lifting and pushing large objects, sitting on low chairs, heavy sports loads and exercises involving rapid alternation of start and stop.
Take care of yourself and knee joints will no longer bother!
The role of warm-up for performance in back pain
Have you seen how a cat prepares to jump?
First, she takes a stance, bending her limbs, then shifts from paw to paw and beats her tail from side to side several times.
And only after this peculiar ritual does it rapidly rush forward.
This ritual is nothing more than a warm-up before the jump, or preparation for it. For people involved in sports or physical education, not a single workout is complete without a warm-up. It all starts with her.
During the warm-up, our musculoskeletal system and a number of other systems and endocrine glands are prepared for the main training task or any other load. Appropriate reversible changes occur in them, which provide an increase in working capacity, endurance, attention, coordination, accuracy and dexterity, and speed of movements.
Neglect of such important part training leads to serious injuries: fractures, bruises, tendon ruptures, muscle strains and much more, especially in conditions where great attention and high precision of movements are required.
In addition, the warm-up restores and improves the blood flow of those organs that were in unfavorable conditions of reduced microcirculation.
Given the positive effect of warm-up on the body, be sure to use it:
- before the start of training;
- before hard physical work or heavy lifting;
- before work, associated with the torso tilt forward or with a long stay in one (especially uncomfortable) position.
Morning gymnastics by the nature of the exercises resembles a warm-up and, in fact, is it. Like a warm-up, it will not replace sports and physical education for you, since it is not capable of causing appropriate shifts in the body and purposefully developing motor abilities.
Read also: Mri of the shoulder joint at the old village
There is a huge amount exercise used for warm-up. Their main goal is to “stretch” the body to one degree or another, depending on the nature of the upcoming loads. In many publications on physical therapy for osteochondrosis, they are described in detail and advertised as therapeutic exercises.
And if you use them to warm up, then this is quite enough. For those who do not know where to start, it is proposed exemplary complex warm-ups.
An approximate set of physical exercises for warming up
Usually, the warm-up begins with a light run in place or jogging outside at a slow pace for 5-10 minutes.
Walking is allowed for the elderly.
The following exercises are performed:
- leisurely;
- to the right and left side;
- with a gradual increase in the range of motion;
- an average of 15-20 times.
Circular movements in the shoulder joints (Fig. 15)
Starting position: standing, feet shoulder-width apart. Spreading your arms to the sides, rotate them forward, and then back.
Circular movements in the elbow joints (Fig. 16)
Starting position: the same. Hands to the sides, and, bending them at the elbows, perform circular rotation of the forearms due to movements in the elbow joints. Keep your shoulders horizontal.
Circular movements in the wrist joint (Fig. 17)
Starting position: the same. Bending your elbows, clench your fists and rotate your hands, first in one direction, then in the other direction.
Shrugging (Fig. 18)
Starting position: the same. Raising your shoulders, additionally perform circular movements.
Arm extension (Fig. 19)
Starting position: the same. Bring your arms bent at the elbows at chest level, and then spread them as if you are trying to connect your elbows behind your back (Fig. 19 a). Then, again bringing the hands together in front of the chest (Fig. 19 b), spread them apart, straightening at the elbows.
Circular movements in the ankle joints (Fig. 20)
Starting position: sitting with legs extended forward. Having thrown the leg over the arm bent at the elbow, take the foot with the other hand and rotate it first in one direction, then in the other direction.
Circular movements in the hip joints (Fig. 21)
Circular movements in the knee joints (Fig. 22)
Starting position: standing, feet shoulder-width apart. Slightly bend the torso and legs at the knees, put the hands on the knee joints. Make circular motions at the knees by straightening the legs and slightly lateral tilt at the knees. Hands help and control the angle of inclination.
Circular movements of the pelvis (Fig. 23)
Starting position: standing, feet shoulder-width apart, hands on the belt. Make rotational movements of the pelvis, first in one direction, then in the other direction.
Torso to the sides (Fig. 24)
Starting position: the same. Tilt your body alternately left and right.
Torso forward (Fig. 25)
Starting position: standing, feet shoulder-width apart. Exhale with each lean forward, inhale as you straighten your torso.
Body rotations (Fig. 26)
Starting position: standing, feet shoulder-width apart, spread your arms to the sides. Rotate your body left and right. To engage the upper and lower spine during the exercise, raise and lower your arms relative to shoulder level.
Circular movements of the body (Fig. 27)
Starting position: standing, feet shoulder-width apart. Clasping your hands at the back of your head, make circular movements with your body.
"Mill" (Fig. 28)
Starting position: the same. Spreading your arms to the sides, make circular movements of the torso in an inclination forward.
Circular movements of the head (Fig. 29)
Starting position: the same. When doing this and two following exercises be careful not to make sudden movements.
Lateral tilts of the head (Fig. 30)
Turning the head right-left (Fig. 31)
Lowering the knees to the right-left (Fig. 32)
Starting position: lying on your back; bending the legs at the knees and hip joints, lower them alternately to the right or left relative to the axis of the body.
Starting position: the same. Spread your arms to the sides and try to reach the knee of the right leg of the left elbow and, conversely, the knee of the left leg - the right elbow.
Reaching the floor with the foot from the opposite side (Fig. 34)
Starting position: lying on your stomach, arms to the sides. Without lifting your hands from the floor, bring your leg back, touching the floor from the side of the opposite hand. Gradually, with each attempt, try to get closer to the brush.
Use this set of exercises as a warm-up and before starting a workout. A warm-up prepares us for physical education and any other physical work, increases reaction and attention, temporarily changes the properties of tissues, making them resistant to stress and even overload. Remember that the lack of a warm-up at the beginning of classes can lead to serious injuries.
The healing effect of physical education has been known since time immemorial. Outstanding physicians of antiquity considered physical exercise a means of prolonging life and youth. “If you exercise, there is no need to use drugs,” said the famous medieval physician and philosopher.
In order to constantly maintain the musculoskeletal system in the right shape, it is necessary to approach the choice of furniture with all seriousness. Its design must ensure the correct and comfortable posture
Rest long before you get tired. Take breaks from work. Determine for yourself their optimal number and duration. Learn to pay attention to the fatigue of the muscles and spine.
Technique: from the starting position, the legs are together, bent at the knee joints, the hands are located on the knees, perform circular movements in the knee joints, first clockwise, then counterclockwise.
Read also: Treatment of osteoarthritis of the knee joint at home
Photo 31. Circular movement in the knee joints clockwise
Photo 32. Circular movement in the knee joints counterclockwise
The nature of the impact: warming up the ligaments of the knee joints and leg muscles.
Important points: use your hands to control the load on the knee joints. The pace of movements is slow, breathing is arbitrary.
Turning the pelvis to the right and left
Circular movements of the pelvis
Technique: from the initial position of the legs shoulder-width apart, hands on the belt, perform circular movements with the pelvis, first clockwise, then counterclockwise.
The nature of the impact:
Important points: try to save upper part the torso is motionless, do not bend the legs at the knee joints, relax the muscles of the torso and pelvis. The pace of the exercise is slow, breathing is arbitrary.
Technique: from the starting position of the legs together, arms bent at the elbows at chest level, rotate the pelvis to the right and left.
The nature of the impact: the hip joint and muscles of the hip region are warmed up.
Important points: try to keep the upper body motionless, do not bend the legs at the knee joints, relax the muscles of the torso and pelvis. The pace of movements is average, breathing is arbitrary.
Technique: from the starting position, the legs are together, bent at the knee joints, the hands are located on the knees, perform circular movements in the knee joints, first clockwise, then counterclockwise.
The nature of the impact: warming up the ligaments of the knee joints and leg muscles.
Important points: use your hands to control the load on the knee joints. The pace of movements is slow, breathing is arbitrary.
Technique: from the starting position, the legs are together, bent at the knee joints, the hands are located on the knees, perform circular movements in the knee joints, first clockwise, then counterclockwise.
Photo 31. Circular movement in the knee joints clockwise
Photo 32. Circular movement in the knee joints counterclockwise
The nature of the impact: warming up the ligaments of the knee joints and leg muscles.
Important points: use your hands to control the load on the knee joints. The pace of movements is slow, breathing is arbitrary.
As already mentioned in the article “Knee joint - treatment”, regular exercises with the implementation of simple special exercises are necessary to restore normal motor activity. leg joint exercises.Some experts rank flexibility as second most important to health after endurance. And since mobility in the joints deteriorates over the years, the only way to maintain and often develop flexibility is to constantly train the mobility of each joint.
This opportunity is provided by gymnastics, proven in effectiveness, according to qigong system.
Popular in China and abroad for its effectiveness in the treatment of leg joints Qigong exercise set, which in Chinese is called “Liangun shi ba fa”. The secret of its popularity lies in the simplicity and accessibility of the movements performed.
You can learn them on your own without qigong instructor. At the same time, the effect obtained from the classes is comparable to the effect from the practice of very complex complexes.
Each exercise is an excellent general strengthening and preventive measure and has a powerful healing and healing function. For the treatment of knee joints, the complex includes an exercise called “Circular movements of the knee joints”.
Starting position: legs together, torso tilted forward, hands of both hands on the knees, head raised, gaze directed forward.
1. Bend your knees, rotate your knees clockwise.2. Return to the starting position.
3. Bend your knees, rotate your knees counterclockwise.
4. Return to starting position.
Perform the exercise 8 times.
When performing the exercise, make sure that the rotations in the knee joints are uniform and smooth, the range of motion is maximum. When the knees are laid back, the legs should be straight, the heels should not come off the floor. Breathing is arbitrary and even.
Purpose and effect
An exercise develops the knee joint- increases the flexibility of the ligaments and increases their strength. A similar effect is being exerted on other major leg joints. When performed correctly, you should feel the so-called Qi feeling in your knees and ankles.
Having taken the first step in mastering this not difficult qigong exercises, you can easily become instructor and hold qigong training Your friends, relatives, who have joint problems. They will only be grateful to you for it. The rest of the exercises of the “Liangun shi ba fa” complex will be discussed in other articles.
A useful addition to the described exercise would be the use of infusions and decoctions of herbs that normalize metabolism, such as milk thistle.
According to the materials of the All-China Association of Health Qigong.
Circular movements in the knee joints
Technique: from the starting position, the legs are together, bent at the knee joints, the hands are located on the knees, perform circular movements in the knee joints, first clockwise, then counterclockwise.
Photo 31. Circular movement in the knee joints clockwise
Photo 32. Circular movement in the knee joints counterclockwise
The nature of the impact: warming up the ligaments of the knee joints and leg muscles.
Important points: use your hands to control the load on the knee joints. The pace of movements is slow, breathing is arbitrary.
Circular movements of the foot with the help of hands
Technique: from the starting position, perform active movements of the hand holding the foot, circular movements of the foot, first clockwise, then counterclockwise. After completing the exercise for the right leg, do the same for the left leg.
Starting position: get up; legs are straightened, both feet are firmly pressed to the floor and do not come off it during the exercise.
Slightly bend the right leg at the knee (while it moves forward) - inhale. Then, without stopping, bend your left leg at the knee - and inhale again. Thus, while inhaling, the knee of one leg sharply moves forward, while the other leg straightens sharply at this time. Exhale passively after each breath through the nose or mouth, whichever is comfortable. Remember that exhalation is used, exhausted air, it is forbidden to think about it!

Exercise "Prancing the knees": inhalation phase
The exercise can be done not only standing straight, but also leaning forward, as in the “Pump” exercise from the main complex: the back is round, the head is lowered, the neck and shoulders are relaxed, the hands are above the knees.
You can also put your hands on your knees and perform the exercise, resting your palms on your knees. This position is called the high start position. Many patients find it much easier to do this exercise in this position.
Norm: 96 breaths-movements ("hundred"). Starting to master the exercise, after every 8 breaths-movements, rest for 3-5 seconds. Having trained well, you can do 16 or 32 breath-movements without rest.
The exercise “Pranking the knees” strengthens the knee joint, it is indicated for its arthrosis. The hip and ankle joints are also strengthened. It is used as a prophylactic for fractures and dislocations.
Exercise "Carroting the hips"
Starting position: stand up straight; both feet are firmly pressed to the floor and do not come off it during the exercise.
On the count of “one”, push the right thigh back to failure, while the left leg is bent at the knee - inhale.
On the count of "two" without stopping, push your left hip back to failure, while the left leg straightens and, as it were, bends back, as if you want to push the person standing behind you with your hip - inhale.
The body is relaxed, with a push of the hip back, the body moves forward. The arms are relaxed and hang freely along the body. If they interfere with your movement, you can put your hands on your hips.

Exercise "Hip Prancing": starting position

Hip Prancing exercise: inhalation phase
Think of a rag puppet being pulled by strings. This is how your body should be relaxed when doing this exercise. And do not forget to sniff noisily, all over the apartment with every movement.
So, push the hip back, the knee of the other leg moves forward - inhale. Another hip back to failure - inhale. Exhalation is absolutely passive and is performed independently after each inhalation.
Norm: 96 breaths-movements. Rest after every 8 or 16 breaths-movements, and with good fitness - after 32 breaths-movements.
You can perform all three of these exercises in sequence at a time, reducing the rate for each to 32 breaths-movements. In total, the same Strelnikov's "hundred" will turn out in this way.
This exercise strengthens the hip joint, causes a sharp rush of blood to the pelvic organs. Especially recommended for teenagers who are lagging behind in physical development, but contraindicated for independent use in S-shaped scoliosis. It is an excellent therapeutic and prophylactic agent for prostatitis, impotence and other disorders of the genitourinary system in men, helps to eliminate a number of gynecological diseases in women.
Three exercises from the group "Carrot" are incredibly useful for the lower extremities!
Firstly, they develop and strengthen the legs well, making them more mobile and strong.
Secondly, along with muscles, ligaments and tendons, the hip, knee, ankle joints and the entire foot are strengthened (talocalcaneal-navicular, calcaneo-cuboid and wedge-navicular joints, transverse tarsal joint, tarsus-metatarsal, metatarsophalangeal and interphalangeal joints of the foot ).
Thirdly, the blood flow in the arteries of the thigh, lower leg and foot improves, the walls of the superficial veins are strengthened, and congestion in the lymph nodes and vessels of the legs.
Exercise "Circular movements of the knees"
Starting position: high start pose. Stand up straight; legs straight, feet and knees together. Bend your back, lower your head, relax your neck and shoulders. Rest your hands on your knees.


Exercise "Circular movements of the knees": inhalation phase
On the count of “one,” sharply bend your knees (knees push forward with a push) and inhale briefly, noisily through your nose. Immediately, without a pause, perform a circular motion with two bent knees to the right and at this time exhale absolutely passively. Straighten your knees at the end of the circle. Then, while inhaling, repeat a sharp lunge with your knees forward, that is, sit down slightly on both legs, while passively exhaling, again perform a circular motion with your knees to the right and return to the starting position. The torso is tilted all the time, as in the “Pump” exercise, the hands do not come off the knees.
Please note: after each circular movement, the knees must be straightened, after which they sharply bend while inhaling, as during a half-squat.
After taking 16 breaths-movements, straighten up, lower your arms and rest for 3-5 seconds. Then again take a high start position and perform 16 breaths-movements, rotating your knees to the left side. In total, 32 breaths-movements will turn out.
Norm: 96 breaths-movements (three "thirty").
With good training, you can take 32 breaths-movements without stopping (16 rotations in each direction) and only then rest for 3-5 seconds (if you are tired, increase the pause to 10 seconds).
Do not forget that a short and noisy breath through the nose is taken only while bending the knees forward, and with a circular movement of the knees, the air leaves on its own through the nose or mouth. “Exhalation is the outgoing breath!” - Alexandra Nikolaevna Strelnikova reminded patients.
This exercise strengthens the knee joint, it is indicated for its arthrosis. The hip and ankle joints are also strengthened. It is also used as a prophylactic for fractures and dislocations.
Standing knee hula hoop exercise
Starting position: stand straight; straight legs are spaced slightly narrower than shoulder width (main stance), arms are freely lowered along the body.
On the count of "one", quickly move your legs at the knees, press them against each other - a short noisy breath.

Standing knee hula hoop exercise: starting position
On a passive exhalation with slightly bent knees, perform circular movements (while starting the rotation with the movement of the knees forward), as if describing circles with a compass: with the right knee to the right, and the left knee to the left.
Never lift your feet off the floor. And try to "draw" circles as much as possible bigger size(that is, spread your legs as far as possible to the sides).
The knee is an anatomically complex joint, which bears the entire weight of the body during movement. painful and for a long time incapacitates even experienced athletes. According to the results scientific research 26% of the adult population of the planet suffers from knee pain, the number of complaints has been constantly growing over the past 20 years. Don't wait for warning signals, act proactively by regularly doing simple exercises to strengthen your knees to reduce the risk of injury.
The best way to prevent injury is to have strong, flexible muscles and joints that resist stress and injury. In some simple cases of knee pain, certain exercises can help relieve the pain. Remember, never do any exercise that causes pain to increase.
Before class, be sure to warm up the muscles in order to prepare for the loads, improve local blood circulation. A good option warm-ups - circular movements of the knees while standing on slightly bent legs.
There are 2 options for the exercise. The leg lift is performed from the starting position lying on the back or the leg is lifted from the position lying on the side. The first option additionally includes the thigh muscles, the second option - the abdominal muscles.
Option 1:
- Lie on your back. The shoulder blades and lower back are firmly pressed to the floor. One leg is bent at the knee, the other is straightened.
- Lift your straight leg off the floor, hold on weight for 15-30 seconds, return to the starting position.
Option 2: 
- Lie on your side. Lean on your forearm. Bend the lower leg at a right angle, straighten the upper leg.
- Raise and lower your straight leg.
All movements should be performed slowly and smoothly.
Lunges
Lunges place stress on the knees, helping to strengthen the calves and thigh muscles, stabilize the knee joint.

- Starting position standing, legs together, hands on the waist, back straight.
- Step forward with one foot and bend both knees at the same time.
- The extended leg, when bent, forms a right angle. The back knee almost touches the floor.
- Return to starting position. If you do everything right, you should get springy movements.
- Repeat the same movements for the second leg.

- Starting position standing, back straight.
- Bend your knee and lunge to the left.
- Without straightening your knees, shift your weight to the other leg in a lunge to the right.
- Make sure that the knee of the supporting leg is exactly above the foot.
Stretching
Stretching exercises are done from different starting positions. The lying position helps to avoid the load of its own weight.
Stretching in the supine position, technique: 
- Lie on your back. Raise one leg, bending at an angle of 90 degrees. Straighten the other leg on the floor.
- Slowly unbend bent leg, point the sock towards you. Then return to original state.
Standing stretching technique: 
- Lean on a firm surface for balance. Pull the left leg bent at a right angle to the back.
- Hold at the top for 3-5 seconds.
- Return to starting position.
- Repeat the movement with your right foot.
Exercises are performed without jerking at a comfortable pace. Stretching improves muscle elasticity, relieves stiffness in the knee joint.
"Martin"
 The Swallow exercise trains the leg muscles while improving balance and coordination.
How is it done:
- Starting position standing, back straight, legs brought together. Spread your arms out to the sides at shoulder level.
- Lean on one leg, tilt your torso forward, take the other leg back, reaching parallel with the floor.
- Hold this position for as long as you can, then return to the starting position.
 Contrary to the popular myth that squats are dangerous for the knee joint, this exercise is performed in correct technique, heals the knees, strengthening the ligaments and muscles of the legs.
Technique:
- Stand straight, feet shoulder width apart. Take your shoulders back. Pull your stomach in.
- Slowly lower yourself, pulling your buttocks and hips back.
- Bend your knees until muscle tension appears. Then get up.
- Maintain balance and coordination, do not round your back. The knees should not go beyond the line of the socks.
When doing squats, you can’t rush, jerk down
Options for reducing the axial load:
- wall squats;
- squats, holding hands on a support.
Try to spend 20-25 minutes daily on your knees. Efficiency is guaranteed only by regular physical activity. Keep your health for a long time!
Be sure to read about it

Charging for the joints is one of the main criteria for the fight against joint diseases. Physical inactivity is one of the main reasons for the development of arthrosis and arthritis. Modern man has to move less than his ancestors. The reason for this is progress. Many have to sit at work, others spend a lot of time sitting on the way to it.
The result is joint disease!
Important! Charging, or swimming with arthrosis of the knee joint, as, indeed, of any other joint, is aimed at strengthening it, restoring its flexibility and mobility. For a person, these moments are vital.
Otherwise, he simply becomes disabled and is deprived of the opportunity to perform everyday activities and take care of himself.
Physical exercise is necessary for rheumatic diseases, which are:
- gout,
- arthritis,
- radiculitis,
- steochondrosis,
You can also do yoga. The patient, together with his doctor, must choose those exercises that will be most appropriate in a particular case. Loads should be evenly distributed on all joints and muscles - from the cervical vertebrae to the feet.
Classes can be structured in such a way that each time more attention will be paid to a specific muscle group, so the joints will be developed more carefully.
Any exercise should be done in slow pace. Sharp inclinations, turns, flexions and extensions should be avoided. Swimming with arthrosis is a necessary therapeutic measure.
The mandatory program of therapeutic exercises should include both light relaxing exercises and a complex for creating a load in one or another area of the body.
By the way, even if there is arthrosis and pregnancy, then classes will not be contraindicated.
Thereby:
- ligaments are strengthened;
- compression is removed from the joints;
- muscle atrophy is prevented.
Coaches in therapeutic exercises offer patients with arthritis a few simple, but at the same time effective exercises, thanks to which the joints of the elbows, shoulders, knees and ankles are worked out.
Exercises for joints of different groups
For elbows:
- Starting position - standing or sitting. Shoulders should be parallel to the floor, arms can be bent at the elbows, hands clenched into a soft fist. It is necessary to perform rotational movements with the forearms: first 10 times in one direction, then in the other direction. Shoulders should not move.
- The starting position is the same. Only when performing this exercise, you need to make rotational movements first towards yourself, then away from you. 10 times.
For shoulder joints
Starting position - standing, arms hang freely along the body. The right hand must be rotated in front of you in the frontal plane. Gradually, the rotation speed can be increased.
Do 10 rotations clockwise and the same number - counterclockwise. In more detail in our article - therapeutic exercises for the shoulder joint, where there is a set of exercises.
For feet
 Starting position - standing or sitting. In a standing position, you need to lean against the back of a chair or a wall.
The patient bends the leg at the knee, the thigh should be parallel to the floor. You need to make rotational movements with your lower leg. 10 times inside, 10 times outside. T
do the same with the other leg. Sitting to perform the exercise is easier, you can hold on to the seat with your hands.
For knee joints
Starting position - standing. The legs are slightly wider than the shoulders, the palms lie on the knees, which are half-bent. The feet should be parallel to each other, the socks slightly turned inward. Such exercises for arthrosis of the knee joint help restore blood circulation in the tissues of the joint.
The back should be kept straight, the gaze is directed straight. Circular movements of the knees are performed first inward, then outward. And so on 10 times. You can use your hands to help your knees rotate.
This set of exercises should definitely be included in your daily program. If there are no contraindications, yoga is recommended. To work out and strengthen the vertebrae cervical you need to perform the movements that are included in exercise therapy for the neck.
Gymnastics for the joints: when indicated, a set of exercises to improve their mobility
Arthritis, arthrosis, osteochondrosis are diseases of the joints that are severe, painful and worsen the quality of human life. In order to prevent such problems, as well as to reduce symptoms in the chronic course of the disease, gymnastics for the joints is used. This is a great set of exercises to improve joint mobility, relieve muscle tension and improve blood flow.
The human joint serves to connect bones where active movement is expected: hands, elbows, knees, ankle. The joint consists of:
- bags;
- two articular surfaces of bones, which are covered with a dense hyaline sheath;
- synovial membrane and fluid;
- articular cartilage.
As we age, the cartilage thins, the hyaline sheaths wear away, and the bones start to touch as they move, causing pain. Gymnastics promotes the flow of synovial fluid, develops muscles, increases blood flow and oxygenation of the joint. For each group of joints, there is a set of exercises that most favorably takes into account the features of work and the mechanics of the action of the limb.
Gymnastics for arms and hands
The pollen of the hands is most commonly affected by degenerative changes in arthritis and therefore needs to be exercised just like the rest of the body.
- Gymnastics of the fingers begins with a smooth squeezing and unclenching of the palms. We tightly squeeze the brush into a fist and straighten it sharply, releasing the accumulated tension. We repeat the exercises for 10-15 approaches 2-3 times a day.
- Fan-shaped movement of the fingers from the index to the little finger and vice versa for 5-7 approaches. It is advisable to do the exercise first with one hand, then with the other, since it is difficult to coordinate. When the hands themselves get used to the action, you can perform at the same time.
- We spread and move our fingers on our hands at the same time 10 times in a row.
- We connect the tips of the fingers with a “house”, press on them, then relax - 10-20 times.
- Place your palms on a hard surface such as a table or stool. We alternately raise each finger 2-3 times, as if playing the piano. Then the exercise can be complicated by adding rotation to the right and left to raise the finger.
wrist joint
Action algorithm:
elbow joint
- We bend our arms at the elbow and rotate alternately to the right, to the left, randomly.
- We lower our arms along the body, then bending them at the elbow joint, bring them to the shoulder. We repeat 10-20 approaches.
shoulder joint
Shoulder injury is more commonly associated with cervical osteochondrosis. Violation of blood supply and innervation in the vertebrae leads to the appearance of humeroscapular periarthritis - inflammation of the shoulder joint involving the scapula and surrounding muscles. The disease is manifested by pain when trying to withdraw and raise the arm, discomfort in the area of the muscles of the scapula, during an exacerbation, an ache appears in the neck, shoulder, scapula, which spreads to the muscles of the arm, the muscles are sharply tense and painful on palpation. AT severe cases there is weakness and gradual atrophy of the muscles.
Therapeutic exercises for the shoulder include exercises aimed at developing the cervical and thoracic spine.
For diseases in the shoulder joint associated with a disease of the spine, it is best to perform gymnastics while lying on your back. Exercises: abduction, adduction of the arm, raising the arms forward, raising the shoulders - all easy to do while lying down. This will eliminate muscle spasm, reduce the risk of exacerbations, and safely restore the muscle frame.
Ankle joint
The weight of the human body rests on it, so it has huge force, so all therapeutic exercises perform 2-3 approaches and 15-20 times.
- bend the leg at the knee joint and rotate the foot in a circle in one direction and the other;
- the leg is bent, we pull the toe towards us and away from us, slight soreness is allowed;
- rotate the foot to the left and right according to the maximum amplitude;
- sitting or lying down exercise: squeeze and unclench your toes as much as possible.
Knee-joint
The knee accounts for the majority of sports injuries and often marks the end of an athlete's career. But after 40 years, the knees begin to hurt in almost every person. Washing out of calcium salts, wear of cartilage, displacement of the meniscus and a huge load do their job - the knees begin to crackle, hurt when you try to sit down. Exercise therapy after 40 years is a necessary condition for the health of the knee joint.
- The legs are standing together, the hands are placed on the knees, the knees are smoothly rotated to the right, then to the left. It is not necessary to do a large amplitude, all movements are neat, painless.
- Rotation of the lower leg - the leg is bent at the knee.
In osteoarthritis of the knee, exercise therapy is widely used according to the method of Evdokimenko, a well-known Russian rheumatologist. The doctor chose the most effective exercises for the knee joint with arthrosis, which help to avoid surgical treatment.
After conducting exercise therapy according to Evdokimenko, self-massage of the legs should be carried out with light rubbing and patting movements. This will reduce the amount of lactic acid in the muscles, disperse the blood, and the next day you can repeat the exercise without the appearance of pain.
hip joint
The largest and most powerful joint in the human body. Arthrosis in the hip joint disrupts the function of walking and causes excruciating pain to a person. The third degree of the disease ends with joint arthroplasty and its replacement with a metal structure. A serious operation can be prevented with due effort on the part of the patient: only daily training will relieve pain, restore tissue trophism and allow you to delay, and sometimes avoid the surgeon's knife.
All exercises must be performed with maximum unloading in the joint: from a supine position, side, stomach. The smooth and calm technique of Evdokimenko, coupled with the well-known therapeutic techniques of exercise therapy, will also come in handy here.
- Lying on your stomach and firmly pressing the pelvis to the mat, raise your legs and do “scissors”, this exercise strengthens the muscles of the pelvis, buttocks and back, forming a strong muscular frame that holds the hip joint.
- The position is on the right (left) side, the leg that is pressed to the floor is bent at the knee, the opposite leg is straightened as much as possible and lifted up, holding for 10-15 seconds. We repeat the exercise 5-10 times, gradually increasing the number of approaches.
- In a sitting position on the floor, we pull our socks towards ourselves and smoothly try to bend over to our knees. You can not make sudden movements, because you can provoke muscle strain and sharp pain in the back and hips. In the maximum bent position, we stop for 5-15 seconds. We unbend.
All exercises Dr. Evdokimenko developed specifically for the formation muscle corset, the joint itself during the disease is involved in the exercise to a minimum. This provides prevention of exacerbations, strengthens muscles, improves local blood supply. In addition to exercises, the doctor conducts drug treatment, uses manual therapy methods.
Methods of the usual and familiar exercise therapy for diseases of the hip joint:
Apart from regular exercise, there is gymnastics with a ball, sticks, shells, expanders. But these methods must be used already with a certain physical training and under the supervision of an experienced instructor or exercise therapist. There are a large number of "folk healers" who offer exercises of 100-500 repetitions, active squats, running and similar excesses. On diseased joints, you can’t risk it like that! Active exercise stress will cause an exacerbation of the process, inflammation of the joint, surrounding tissues will cause pain and impaired performance. The whole set of exercises for the joints begins with elementary movements and a minimum number of repetitions. When pain occurs, gymnastics is stopped and returned to it for 2-3 days.
Diet is of great importance in the effectiveness of therapeutic exercises. A large number of fresh vegetables, fruits, sea fish, lactic acid products - the need to restore the health of the joints.
It should be remembered that any concomitant disease (for example, hypertension) is a contraindication to certain types of exercise. Therefore, if a person decides to do therapeutic gymnastics for joints, he needs to consult a doctor.
Cure osteoarthritis without drugs? It's possible!
Get the free book "Step-by-step plan for restoring mobility of the knee and hip joints with arthrosis" and start recovering without expensive treatment and operations!
Get a book
Pain in the shoulder joint can cause considerable discomfort to a person, worsen the quality of life and limit the usual mobility of the hands. The doctor may prescribe anti-inflammatory drug treatment in combination with special massage, physiotherapy exercises, as well as special exercises with pain in the shoulder joint to improve its mobility.
What can this symptom mean?
Pain in the shoulder may occur due to physical overload, dislocations, when lifting weights and be the result of inflammatory diseases such as periarthritis, arthrosis, neuritis shoulder joints. Degenerative changes in the joints often occur in middle-aged people. The disease is accompanied by a sharp pain, numbness in the arm, the inability to lift it and bring it behind the back. The exercises described in the article will help get rid of pain and improve the patient's well-being.
Proper warm-up
To begin with, you need to understand that in the acute and subacute period of the disease, different gymnastics techniques are used. So, in the acute period, with severe pain, static types of exercises are performed, where the joint itself will not be involved. In the subacute period, when the condition is stabilized by a course of special drugs, you can perform dynamic movements and play sports.
Warm-up before exercises should be done during the period of remission of the disease, before dynamic types of exercises. It is needed to improve blood circulation and elasticity of ligaments and joints.
The execution technique consists in four repetitions of each of the described movements, sitting on a chair. To start, without jerking, lift your shoulders up, then slowly down. Squeeze them forward and then back towards the back of the chair. And the last thing is the movements of the shoulders in a circle: back and forth and to the sides.
Therapeutic training
To improve mobility and prevent pain, during the recovery period, it is necessary physiotherapy(LFK). It does not carry heavy loads on the joint, it is performed without sudden movements so as not to damage it.
Before starting classes, consult your doctor to adjust the load so as not to harm or aggravate the situation.
The exercises developed by the rehabilitation doctor Popov are effective. He believes that a diseased joint should not be left immobilized, otherwise the ligaments and tendons, having memory, will not be able to fully recover. He was able to apply this feature of memorization in his development.
Doctor Popov recommends performing the exercises with smooth movements, without causing pain to yourself, with a good attitude towards recovery. A prerequisite is to keep the spine in a vertical, straight position, with its mandatory inclusion in the charging complex. Each movement is done 7-10 times, if painful sensations appear, you need to reduce the tension and range of motion or go to the next point.
- Seated walking exercises followed by relaxation. Sitting on the edge of a chair with a straight back and slightly apart knees, lift your feet alternately, as if walking. With each lift of the foot, the hands should move along the outer part of the thigh to the knee. In one direction on the inhale, back on the exhale. If there is no discomfort, then you can continue to slide your hand below the knee.
- Relaxation is an important part after each of the exercises. In the starting position on the chair, hang your hands down and as if they have a load. Slightly move the shoulder girdle, tilting and straightening the vertebral section.
- Keeping your hands on the floor, perform circular movements with your shoulders, directing them forward. Don't forget to include the spine in motion.
- As point 2, only we direct the shoulders back. Gradually increase the amplitude of rotations.
- Perform again walking while sitting and relaxing.
- Grasp the wrist with one hand with the other and pull both hands up, if it is difficult, then you can forward, in front of you. Gradually, the back straightens, vertebra by vertebra. If possible, lean back as far as possible in this position, gently lower your hands down. Exhale as you raise your arms, inhale as you lower.
- Make the first point.
- When exhaling, swing your arms forward, slightly crossing, while inhaling back, squeezing the shoulder blades. Then perform the same movements, only alternately with both hands. You need to use the entire body, back and lower back.
- Bend your elbows so that your palms rest on your collarbone. Helping the whole body, move in a circular motion bent arms. Inhale - elbows pointing up, exhale - down.
- From a seated position, slide across outer surface legs, trying to reach the foot (exhale), returning back, try to bring both shoulder blades together (on inspiration).
- We do the first exercise again.
- bend your elbows, thumbs put on your shoulders, the lower back is relaxed. Move your elbows smoothly and alternately back and forth.
- With the spine straight, raise your arms to the sides and up (inhale). First, the palms are directed outward. We lower our hands, palms inward (exhale). Rotational movements.
- Connect the wrists in front of the chest in a lock, elbows to the sides. Try, as far as possible, to perform a wave from one elbow to the other and back.
- Do the first exercise.
- Sitting, knees shoulder width apart. We stretch the left shoulder to the right knee, then the right to the left alternately. We lean forward smoothly.
- Sitting with a straight back, put your hands on your knees. Without tilting the body forward, first one, then the second shoulder is directed towards the opposite knee.
No less effective are the developments of Dr. Bubnovsky. They consist in performing loads of different intensity on a special multifunctional simulator. They allow to restore joint mobility, relieve pain caused by muscle spasms, prevent and accelerate recovery after operations for intervertebral hernias.
Do not expect instant results from these exercises. It is worth doing them daily. Over time, the joint will strengthen, become more mobile and pain will decrease.
Massage will be effective shoulder girdle and adjacent muscles after exercise. It is also good to use special balms, ointments and gels for rubbing and kneading the joint.
Exercise for acute pain
The following exercises will help reduce pain in the aggravation stage. They are recommended to be performed lying on your back, 5-7 times each.
- Lying on a hard surface, bend your elbows. Bend and unbend your wrists without raising your elbows. After doing these movements several times, proceed to rotational movements brushes. Do so many times until you feel a slight fatigue in your hands.
- In the same lying position, bend your elbows in front of you. Lower and raise your elbows to the sides, trying to touch the surface on which you lie.
- Put your hands along the body. Spread them apart, first with your palms up, returning to the starting position with your palms down.
- From a supine position, understand the straightened upper limbs in front of you, smoothly and as you exhale return back. Don't let pain.
- In the starting position, but palms to the surface. Try to press your palms down, lingering for a few seconds.
- Finally, relax and lie down for a few minutes.
When the pain begins to subside, you can begin to perform exercises while sitting on a chair. You should stop during the exercise if the pain begins to intensify. Repeat each exercise 8-10 times.
- Sitting on a chair, knees slightly apart, back straight. With your right hand, try to reach the left shoulder blade, then with the left hand to the right shoulder blade, bring your elbows as far as possible. Hold your elbow while doing this. Repeat alternately with each hand.
- Spreading your elbows to the sides, put your hands on opposite shoulders, as if hugging yourself. Count to 8 and return to the starting position, rest.
- Stand next to the back of a chair and place your hands on it. Perform forward bends, trying not to bend your knees.
- The exercise is performed while standing, feet shoulder-width apart. Stretch your arms forward, palms down, and count to seven. Then reach your left shoulder with your right hand and return it to its original position. Repeat with the other side.
- Take a towel, stand up straight, feet shoulder-width apart. Holding the log by the edges, with straight arms lift it up, bringing it as far back as possible behind the head. Lower your arms to the starting position, repeat. Reduce the distance between the hands, and over time, the amplitude will increase.
- Lie on your side, on the side of your healthy shoulder. Bending the sore arm at the elbow, bring it behind the head as far as possible. Return to starting position. Repeat several times.
- Lie on your stomach so that the arm with the sore shoulder hangs down. Swing the sore arm without straining it back and forth 8-10 times.
Contraindications
Exercises for the shoulder joints are not shown to everyone, you need to know about contraindications.
- elevated body temperature, infectious diseases;
- diseases of the heart and blood vessels in the acute stage;
- complicated diabetes mellitus;
- diseases that exclude any stress on the body;
- sharp pain that worsens with exercise.
Any physical activity is good for the body, if there are no contraindications and approved by a doctor. A set of exercises for pain in the joints of the shoulders will be effective in combination with other appointments and when performed correctly, listening to your body. It is simply necessary to restore the motor activity of the shoulder, reduce pain and return to normal life.
Igor Petrovich Vlasov
- site `s map
- Diagnostics
- Bones and joints
- Neuralgia
- Spine
- Preparations
- Ligaments and muscles
- Injuries